
Contents
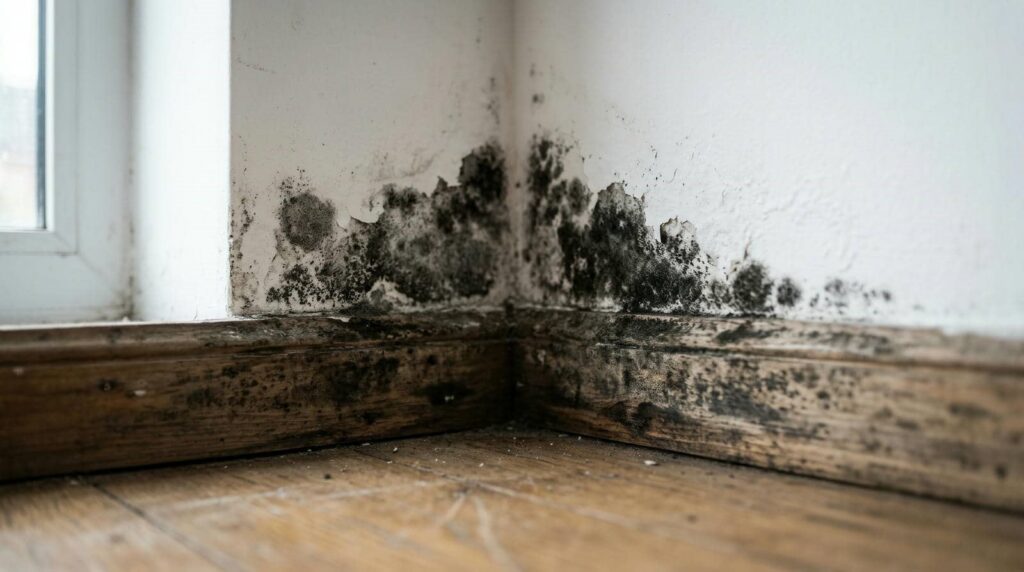
After water damage, acting fast is essential — mold removal becomes significantly harder once spores spread beyond the initial affected area. Stop the water source, remove standing water, and dry the area immediately with fans and dehumidifiers. Then isolate the affected space, use proper protection, and discard porous materials that can’t be salvaged. The next steps determine whether mold stays contained or spreads into hidden cavities.
Key Takeaways
- Shut off the water source immediately and identify the leak to stop further moisture damage.
- Remove standing water fast with a wet vac, sump pump, fans, and dehumidifiers.
- Isolate the mold area by sealing doors, blocking HVAC returns, and limiting access.
- Wear proper mold PPE, including a respirator, gloves, goggles, coveralls, and boots.
- Scrub nonporous surfaces, discard porous moldy materials, disinfect, and keep monitoring for hidden dampness.
Stop the Water and Find the Source
Before you do anything else, stop the water at its source so the damage doesn’t continue spreading. Shut off the supply valve, isolate the affected line, and verify that no active flow remains.
If the leak comes from plumbing, roofing, or an appliance, identify the exact water source quickly so you can plan the next steps with confidence. Use moisture detection tools to trace hidden seepage behind walls, under flooring, and around trim.
Check adjacent rooms, because water often travels farther than the visible stain. Mark the wet perimeter, note any odors, and document what you find.
When you act early, you protect your space, reduce risk, and join the homeowners who keep mold from gaining a foothold.
Remove Standing Water and Wet Debris
You should pump out all standing water as soon as possible using a sump pump, wet vac, or extraction unit to limit moisture absorption.
Remove wet debris quickly, including soaked drywall, carpet, insulation, and contents that can’t be dried and cleaned effectively.
Keep the area clear so you can expose all affected surfaces and reduce the conditions that let mold start growing.
Pump Out Standing Water
Start by pumping out any standing water as quickly as possible, since pooled moisture accelerates mold growth and can damage structural materials.
Use a submersible pump or wet vac sized for the volume you’re handling, and route discharge water away from the foundation.
During your water damage assessment, confirm which rooms still hold moisture and track how far the water spread.
Shut off electricity to affected zones before you enter, and wear boots, gloves, and eye protection.
These mold prevention tips work best when you maintain continuous removal until all visible water is gone.
Check low spots, under appliances, and along baseboards for hidden pooling.
You’re not dealing with this alone; a fast, methodical response helps your space recover safely and keeps mold from getting a foothold.
Clear Wet Debris Quickly
Scoop out and bag wet debris right away, because soaked drywall, insulation, carpet, and contents can keep feeding mold even after standing water is gone.
Wear gloves, boots, and a respirator, then sort salvageable items from porous materials you can’t fully dry. Remove baseboards, wet padding, and damaged insulation so air can reach hidden cavities.
You should move debris to a sealed disposal area quickly to limit mold growth and cross contamination.
After clearing the space, wipe hard surfaces with detergent, then dry them with fans and dehumidifiers. Track humidity and temperature so you can verify drying progress.
These prevention strategies help you and your crew stay organized, protect indoor air quality, and reduce the chance that small damp spots turn into a larger remediation problem.
Dry the Area Fast
You need to remove any remaining standing water immediately, because moisture left behind accelerates mold growth.
Increase airflow right away by opening passages, running fans, and directing air across all damp surfaces.
Keep dehumidifiers running continuously until the area reaches a dry, stable condition.
Remove Standing Water
Act quickly to remove standing water, because the longer moisture remains, the greater the risk of mold growth and structural damage.
You should shut off the source, if it’s still active, then begin water removal with a pump, wet/dry vacuum, or absorbent towels. Work from the outer edges toward the center so you don’t spread contamination.
Empty containers often and keep your footing stable to avoid injury. Check carpets, baseboards, and low spots for hidden standing water, since trapped moisture can persist after the surface looks dry.
If materials are saturated through the pad or underlayment, remove them promptly. You’re protecting your home and your crew by acting methodically, documenting damage, and confirming the area is no longer pooling before you move on.
Increase Airflow Quickly
Next, increase airflow immediately to speed evaporation and limit mold growth. You should open windows and interior doors if outdoor conditions are dry, then place fans to move air across wet surfaces, not directly at isolated spots.
Aim for cross-ventilation so moist air exits and fresh air enters. If you’re drying a shared space, keep pathways clear so air can circulate through corners, baseboards, and behind furniture.
Use airflow techniques that create steady, even movement rather than gusts that push moisture deeper into materials. Choose ventilation methods that match the room layout, including attic vents, exhaust fans, or doorway fan placement.
Check that registers and vents aren’t blocked. Work as a team with anyone helping so each person keeps the space open, dry, and safe for fast recovery.
Use Dehumidifiers Continuously
As airflow starts moving moisture out of the room, run dehumidifiers continuously to pull water vapor from the air and speed drying of walls, floors, and contents.
Keep doors mostly closed so the units can create strong moisture control. Set dehumidifier settings to the warmest safe room temperature and the lowest practical humidity target, usually 30%–60%. Empty or route the drain hose so you don’t interrupt operation.
- Place each unit near the wettest area.
- Keep filters clean for steady airflow.
- Use a hygrometer to verify progress.
- Keep fans and dehumidifiers working together.
You’re protecting your space and helping your team dry materials before mold can take hold.
Monitor readings twice daily and adjust placement if humidity stalls.
Isolate the Mold-Affected Area
Before you disturb any visible mold, seal off the affected area to limit spore spread and protect the rest of the property. Close doors, tape plastic sheeting over openings, and block HVAC returns so air currents don’t carry contamination elsewhere.
If you’re using mold identification techniques, keep inspections confined to this zone and note surfaces that match common mold growth conditions, such as damp drywall, carpet backing, and hidden framing. You’ll work more efficiently when the space is contained, because each task stays tied to a defined boundary.
Mark the perimeter clearly, restrict access, and keep nearby rooms dry and undisturbed. This isolation step helps your team move together, reduce cross-contamination, and maintain control until cleanup begins.
Wear Proper Mold Removal Protection
Before you enter the mold-affected area, put on a properly fitted respirator and chemical-resistant gloves to limit inhalation and skin contact.
Add sealed eye protection to block spores and debris from reaching your eyes.
Wear disposable coveralls and boots that you can remove and clean or discard after the job.
Respirator And Gloves
When you handle moldy materials, wear a respirator rated for mold cleanup and gloves that resist water and contamination. Choose from common respirator types: N95 for light exposure, or a half-mask with P100 filters for heavier cleanup. Fit-check the seal every time so airborne spores don’t bypass the mask.
Select gloves materials such as nitrile or neoprene, since they block moisture and resist tearing better than thin latex.
- Inspect gear before each use
- Replace damp gloves right away
- Keep cuffs over sleeves
- Remove protection without touching skin
You’re part of a careful cleanup team when you use the right barriers. After work, discard disposable items and wash reusable gear with detergent.
Eye Protection Essentials
Your eyes need a sealed barrier during mold cleanup, because spores, dust, and splashes can irritate tissue and carry contamination into your work area.
Choose protective eyewear that fits snugly against your brow and cheeks, then check that the seal stays intact when you move. Among eye protection types, indirect-vent goggles usually give the best defense because they block particles while limiting fog.
If you use an open frame, add a face shield only as extra coverage, not a substitute. Clean the lenses before each task, inspect for cracks, and replace worn straps right away.
When you work with the team, keep your eyewear on until the area is fully contained and cleaned, so you stay protected together throughout the job.
Coveralls And Boots
Zip into disposable coveralls and pull them over your regular clothes to keep mold spores off your skin and out of your home.
Choose personal protective equipment that fits snugly at wrists and ankles, and tape seams if gaps appear. Select boots with non slip soles and mold resistant materials so you can rinse them clean after each pass.
- Step into boots before entering the affected area.
- Keep pant legs outside the boot tops.
- Replace torn coveralls immediately.
- Wash reusable boots with detergent and dry fully.
You’re part of a cleanup team, so stay consistent: don’t eat, drink, or touch your face while suited up.
Remove gear carefully at the doorway, seal it in a bag, and wash up right away.
Scrub Mold From Hard Surfaces
Use a stiff-bristled brush or scrub pad to remove mold from nonporous surfaces like tile, metal, and sealed wood.
Apply your chosen cleaner directly to the area, then work in small sections so you can control spread and see results. Use mold removal techniques that favor firm, overlapping strokes, and keep the surface damp enough to lift residue without soaking nearby materials.
For hard surface cleaning, wipe away loosened growth with disposable towels, then rinse and dry the area thoroughly. Inspect joints, corners, and textured finishes for remaining discoloration, and repeat the process if needed.
Stay methodical, because careful scrubbing helps you restore the space safely and keeps your crew aligned on the same clean, consistent standard.
Throw Out Porous Materials With Mold
If mold has penetrated porous materials, remove and discard them instead of trying to clean them. You’ll protect your space and keep the remediation process controlled.
Bag each item immediately, seal it, and move it out through a clean path to limit spread. Follow local mold disposal methods and check whether hazardous waste management rules apply before hauling anything away.
- Remove soaked drywall, insulation, carpet, and ceiling tiles.
- Seal debris in heavy-duty plastic bags.
- Label bags if regulations require it.
- Use approved disposal sites or curbside pickup guidance.
Wear gloves and a respirator while handling contaminated materials.
If you work as a team, assign one person to transport waste and another to monitor containment. Acting decisively helps your home recover faster and keeps your crew aligned.
Disinfect After Mold Removal
After you remove all visible mold and contaminated materials, disinfect the remaining hard surfaces to reduce lingering spores and microbial growth.
You should clean first with detergent and water, then apply a disinfectant labeled for mold remediation. Follow the product’s dwell time exactly, because contact time determines performance.
When disinfecting surfaces, use effective solutions such as diluted bleach only on nonporous materials, or choose EPA-registered alternatives if bleach isn’t suitable.
Wear gloves, eye protection, and a respirator if needed, and keep the area ventilated.
Wipe or rinse after treatment when the label requires it, then dry the surface completely. This step helps your space stay safe, so your team can move forward with confidence and restore normal use faster.
Check for Hidden Mold in Walls and Floors
Look beyond the visible damage, because mold often grows inside wall cavities, under baseboards, and beneath flooring where moisture lingers. You need to inspect these hidden zones with disciplined mold inspection techniques and wall moisture detection tools, so you can catch problems early and protect your space together.
Remove trim and check for staining, warping, or a musty odor.
Probe drywall edges for softness or crumbling material.
Use a moisture meter on walls, floors, and subfloors.
Inspect crawl spaces and backing boards for discoloration.
If readings stay elevated, open suspect sections for a closer visual check. Record each finding, then compare adjacent areas to map the spread.
When you verify hidden mold, you’ll know exactly where remediation must focus, and your team can move forward with confidence.
Prevent Mold Growth After Water Damage
To prevent mold growth after water damage, you need to dry the affected area within 24 to 48 hours, because moisture trapped in porous materials quickly supports spore activity.
Remove standing water, increase airflow with fans, and run dehumidifiers until relative humidity stays below 60%.
Discard soaked drywall, insulation, and carpet padding that won’t dry completely.
Clean hard surfaces with detergent, then sanitize them according to label directions.
Keep monitoring hidden cavities, baseboards, and subfloors for dampness or odor.
Use preventive measures such as sealing leaks, improving drainage, and maintaining HVAC filters.
When you rebuild, choose mold resistant materials for drywall, flooring, and insulation.
Frequently Asked Questions
How Soon Should Insurance Be Contacted After Water Damage?
You should contact insurance immediately after water damage, ideally within hours. File your insurance claim right away so you protect coverage, document losses, and join others who act fast to prevent delays or disputes.
Can HVAC Systems Spread Mold Spores During Cleanup?
Yes, your HVAC system can spread mold spores during cleanup if you run it before containment. You should shut it down, inspect ductwork, and schedule HVAC maintenance to support Mold prevention and protect your space.
When Should a Professional Mold Inspector Be Hired?
Posthaste, you should hire a professional mold inspector when mold persists, you smell mustiness, or health risks appear after leaks. You’ll get a formal mold inspection, pinpoint hidden growth, and protect your home and family.
Is It Safe to Stay Home During Mold Remediation?
Usually, you shouldn’t stay home during mold remediation unless containment is complete. You must follow safety precautions, protect your mold health, and trust your crew’s instructions so you’re included in a safe, controlled process.
How Do I Document Mold Damage for an Insurance Claim?
You’ll anchor your claim like setting a compass: photograph damage, date each image, note mold identification techniques, and save insurance policy details, receipts, and reports. You’ll create a clear record, and you’re not alone.
Summary
By acting fast, you cut mold off at the source before it can spread like wildfire through your home. Stop the water, remove soaked materials, dry the area, and seal off the damage zone. Protect yourself, clear out porous debris, disinfect remaining surfaces, and inspect for hidden growth. When you finish, you’ve turned a wet, risky problem into a controlled cleanup and lowered the chance of mold returning after water damage.
Recent Posts
Why Hire Pipe Damage Cleanup Experts?
You need fast cleanup, careful cleanup, and expert cleanup when pipe damage hits your home.
What Pipe Cleanup Experts Do Nearby
When a sewer line backs up in your basement after a heavy rain, nearby pipe
5 Best Water Damage Repair Services
When you face water damage, you need a repair service that responds fast, uses the