
Contents
What you may not know is that mold can begin colonizing damp building materials within 24 to 48 hours after water damage. The most critical mold removal tips start with stopping the source, drying the area, and removing saturated porous materials fast, because hidden growth spreads behind walls and under flooring quickly. You’ll also need the right safety gear and cleaning method, because the wrong approach worsens contamination and traps moisture where you can’t see it.
Key Takeaways
- Stop the water source immediately and document the damage for insurance and repair records.
- Dry the area fast with fans, ventilation, dehumidifiers, and moisture checks to prevent mold growth.
- Wear gloves, goggles, and an N95 respirator before handling contaminated materials.
- Remove soaked porous materials like carpet, drywall, and insulation that cannot be safely cleaned.
- Clean and disinfect nonporous surfaces thoroughly, and call a professional if mold spreads or hidden damage remains.
Stop the Water Source First
Before you begin any mold cleanup, you need to stop the water source first. You should locate the leak and shut off the water supply at the main valve or the affected fixture.
If plumbing issues caused the damage, inspect visible pipes, fittings, and connections for active dripping, corrosion, or loose joints. You’ll protect your home best when you confirm the source is fully controlled before you proceed.
If you can’t isolate the problem safely, contact a licensed plumber right away. Document the issue with photos for your records and insurance claim. In a shared building, notify property management so they can coordinate repairs.
Once the source stops, you can move forward with confidence, knowing you’re taking the correct first step as part of your mold response plan.
Dry the Area as Fast as Possible
Once the leak is under control, you need to dry the affected area as quickly as possible to limit mold growth and material damage.
You can protect your space by using targeted ventilation techniques and strict moisture control. Open windows if outdoor air is dry, run exhaust fans, and place portable air movers to keep air circulating through walls, floors, and corners.
Remove standing water with pumps or wet vacuums, then monitor humidity so materials don’t stay damp.
- Increase airflow across wet surfaces
- Dehumidify enclosed rooms continuously
- Inspect hidden cavities for retained moisture
- Check progress with a moisture meter
Act fast, stay consistent, and you’ll give your home a better chance to recover cleanly.
Wear Safety Gear Before You Clean Up
Wear gloves, goggles, and an N95 respirator before you handle any wet or moldy materials. You protect yourself best when you treat cleanup like a controlled task, not a quick chore.
Your safety gear should include disposable protective clothing, nonporous gloves, and eye protection that seals well at the edges. If you work in a shared home, keep your team aligned by checking that everyone wears the same minimum equipment. This reduces contamination transfer and helps you maintain a clean work zone.
Replace any damaged item immediately, since compromised gear won’t protect you reliably. After use, remove protective clothing carefully and wash exposed skin with soap and water.
Proper protection supports a safer, more confident cleanup.
Remove Water-Damaged Materials Right Away
After you’ve suited up, remove water-damaged materials as soon as possible to limit mold growth and hidden structural damage. You should treat porous items as priority losses because they hold moisture after water extraction and can keep wetting adjacent assemblies.
Work methodically so your team stays aligned and the affected area opens up for drying.
- Pull soaked carpet, pad, and underlayment.
- Remove swollen drywall below the visible water line.
- Take out insulation that’s wet or compressed.
- Bag debris promptly to reduce contamination spread.
If you act fast, you’ll protect the building envelope and keep your cleanup crew working in a controlled zone.
Document what you remove, then separate salvageable items from materials that can’t recover.
Clean Moldy Surfaces Safely
Before you scrub, make sure the area is fully ventilated and dry enough to clean without spreading spores.
Wear gloves, eye protection, and a fitted mask so you can work confidently and protect your team’s shared space.
Use a HEPA vacuum or damp microfiber cloth to remove loose debris first, then apply approved cleaning techniques with a detergent solution on nonporous materials.
Scrub gently; aggressive brushing can aerosolize particles and worsen mold growth.
Rinse cloths often, change them when soiled, and dispose of contaminated wipes in sealed bags.
Work from the cleanest section toward the dirtiest, and dry surfaces promptly with airflow.
If staining remains, repeat the process rather than saturating the material.
Disinfect Hard Surfaces After Flooding
You should choose a disinfecting solution that’s appropriate for flood-exposed materials and follow the product’s dilution and contact-time instructions exactly.
After that, clean all nonporous surfaces thoroughly to remove residual contamination and reduce microbial load.
Finish by drying the surfaces completely, since remaining moisture can support mold growth.
Choose Disinfecting Solutions
Select a disinfectant that’s proven effective against mold and safe for the specific hard surface you’re treating, such as a diluted bleach solution, hydrogen peroxide, or a commercial fungicidal cleaner. You’ll protect your space best when you match the product to the material and follow label directions exactly.
Check compatibility with tile, metal, or sealed stone.
Compare eco friendly options with commercial products for performance.
Verify the solution’s mold-killing claim and required contact time.
Wear gloves and improve ventilation before you apply it.
Measure carefully, mix only what you need, and never combine chemicals. When you choose confidently, you help your team restore a safer, healthier environment with fewer risks and better results.
Clean Nonporous Surfaces
After flooding, clean nonporous surfaces promptly so mold doesn’t gain a foothold. You should wear gloves and eye protection, then remove visible soil from tile, metal, glass, sealed wood, and plastic with approved cleaning solutions.
Apply the disinfectant exactly as labeled, keeping the surface wet for the required contact time so spores are neutralized. Work methodically from the cleanest area to the dirtiest to avoid spreading contamination.
Rinse only if the product instructions require it, since residue can reduce effectiveness. These mold prevention strategies help protect shared spaces, equipment, and fixtures you depend on.
When you keep your technique consistent, you support a safer environment for everyone in your home or facility and limit the conditions mold needs to return.
Dry Thoroughly Afterward
Once hard surfaces are disinfected, dry them thoroughly so lingering moisture doesn’t support new mold growth. You should act quickly, because damp residues can recontaminate cleaned areas and weaken your moisture control plan.
Use targeted ventilation methods to move air across walls, floors, and fixtures, then verify dryness with touch and, if available, a moisture meter.
- Open windows when outdoor conditions are dry.
- Run fans to increase surface airflow.
- Dehumidify enclosed rooms to lower humidity.
- Remove wet materials that trap water.
Keep checking hidden seams, grout, and corners, since mold often returns there first.
When you stay consistent, you protect your space and help everyone in it feel confident about recovery.
Use Dehumidifiers to Prevent Mold Growth
Run dehumidifiers immediately to lower indoor humidity and slow mold growth after water damage. Set dehumidifier settings to maintain relative humidity near 45% to 50%, and check the reservoir often so moisture control stays steady.
Place the unit in the driest accessible area with doors open between affected rooms, and let air circulate freely around it. If you’re drying a large space, use more than one unit so your team effort covers the whole area.
Run the equipment continuously until indoor humidity stabilizes and materials feel dry to the touch. Replace or empty collection buckets before they overflow, and clean filters as directed.
Inspect Walls for Hidden Mold
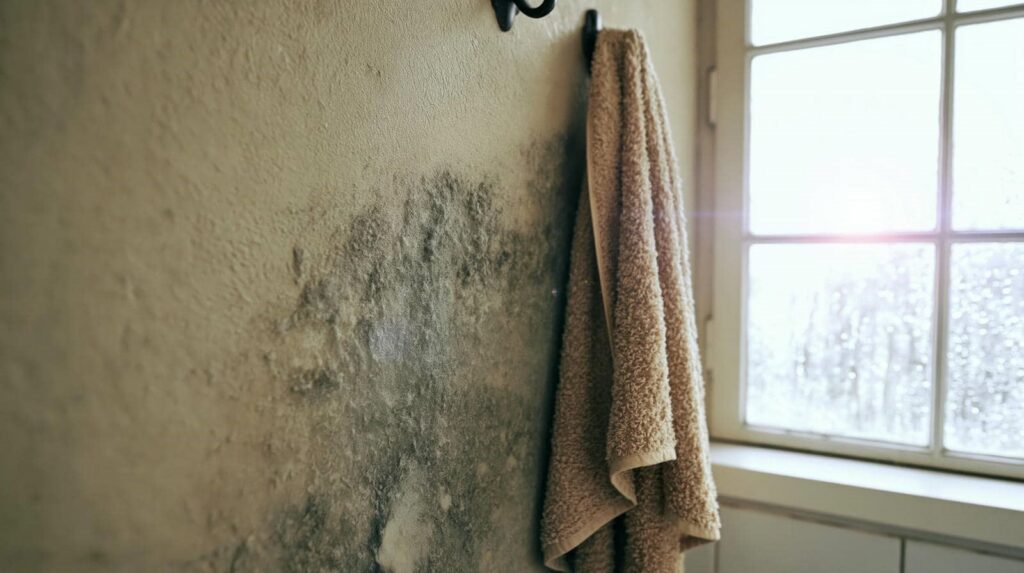
Check walls carefully for hidden mold, especially in areas that stayed wet or dried slowly after the leak. You should use systematic wall inspection methods to spot discoloration, staining, bubbling paint, soft drywall, or a musty odor. In shared recovery spaces, your careful review helps everyone stay safer and confident.
Trace moisture paths from floors to ceilings.
Press gently to find softened sections.
Inspect behind baseboards and around outlets.
Use mold detection techniques, such as a flashlight and moisture meter.
If you find suspicious patches, mark them and compare both sides of the wall for matching signs. Document each location, then keep the area dry while you plan the next step.
Throw Out Porous Items That Can’t Be Saved
Discard porous items that have soaked up contaminated water and can’t be fully cleaned and dried, such as carpets, carpet padding, drywall, insulation, upholstery, paper goods, and heavily damaged ceiling tiles.
You should treat these porous materials as unsalvageable because moisture can remain trapped and support mold growth. Bag each item promptly, seal it, and move it out of the affected area to limit spread.
Use approved disposal methods that match local waste rules, and keep pathways clear for safe removal. Wear gloves, eye protection, and a respirator if dust or spores may release.
You’re protecting your home’s recovery when you remove contaminated materials quickly and completely, giving your space a cleaner, safer path forward for everyone in it.
Call a Mold Removal Expert If Needed
If mold keeps returning, spreads beyond a small area, or has affected hidden spaces like wall cavities and HVAC components, you should call a mold removal expert. You’ll protect your property and join a community of owners who act early.
Expert consultation benefits include moisture mapping, containment planning, and safe disposal of contaminated materials. A qualified technician can also verify whether structural drying is complete.
Consider help when:
- odors persist after cleaning
- drywall or insulation stays damp
- visible growth covers more than 10 square feet
- you need mold prevention strategies for long-term control
You can’t always see the full extent of damage, so professional testing and remediation reduce risk, limit recurrence, and restore indoor air quality efficiently.
Frequently Asked Questions
How Soon Can Mold Start Growing After a Flood?
Mold can start growing within 24 to 48 hours after a flood. In the flood aftermath, you should begin mold prevention immediately: dry materials fast, remove wet contents, and keep humidity below 60%.
Can I Stay in My Home During Mold Cleanup?
You can stay home during mold cleanup if containment, ventilation, and protective gear protect you. Prioritize mold cleanup safety and monitor home air quality closely. If odors, symptoms, or spread persist, you shouldn’t remain.
What Health Symptoms Suggest Mold Exposure?
Mold exposure can cause allergy symptoms, respiratory issues, skin irritation, and headaches; you might also notice coughing, wheezing, or congestion. These health risks often reflect your immune response, so you shouldn’t ignore persistent symptoms.
Does Homeowner’s Insurance Cover Mold Removal?
Usually, your homeowner’s insurance won’t cover mold removal—unless your insurance policies include specific mold coverage. You’ll need to review the fine print; hidden exclusions often decide everything, and you deserve clear answers before damage spreads.
How Do I Know if Mold Is Still Hidden?
You’ll know hidden mold remains if you spot hidden mold signs like musty odor, discoloration, or warped materials. Use mold detection methods—moisture meters, inspection, and air sampling—to confirm growth behind walls or under floors.
Wrap-Up
By acting quickly, you keep a small moisture issue from becoming a larger concern. Stop the water source, dry the area, and remove damaged materials without delay. Wear protective gear, clean affected surfaces, and check for hidden dampness behind walls. If the situation seems extensive or keeps recurring, bring in a mold removal expert. Your prompt response helps protect your property, supports healthier indoor air, and minimizes future complications.
Recent Posts
7 Tips for Home Water Damage Assessment
Could a quick visual check reveal water damage before it spreads? Water damage assessment starts
7 Home Water Damage Assessment Tips
Could a quick visual check reveal water damage before it spreads? Water damage assessment starts
10 Best Home Water Damage Assessment Tips
If you suspect water damage, you need to move quickly and assess it methodically. Home