
Contents
When water damage hits, you have 24 to 48 hours before water damage mold remediation becomes unavoidable. Shut off the source, remove standing water, and start drying with fans and dehumidifiers. Then assess what materials can be saved and what must be removed. The next steps depend on moisture levels, visible growth, and how far contamination has spread.
Key Takeaways
- Act within 24–48 hours: stop the water source, remove standing water, and isolate wet areas immediately.
- Dry damaged areas fast with fans, dehumidifiers, airflow, and moisture checks until materials are fully dry.
- Find and fix the leak source by inspecting plumbing, roofs, windows, fixtures, and appliance connections.
- Remove mold-contaminated porous materials that cannot be cleaned or dried, and bag debris safely.
- Call professionals if mold is visible or odors persist, and prevent future growth by controlling humidity and monitoring moisture.
Stop Water Damage Mold Growth Fast
To stop water damage mold growth fast, you need to act within 24 to 48 hours: shut off the water source, remove standing water, and begin drying affected materials immediately.
You should deploy an emergency response plan that isolates wet areas, increases airflow, and lowers humidity below 60%. Use dehumidifiers, fans, and moisture meters to verify progress.
Remove porous items that can’t dry fully, and clean hard surfaces with approved antimicrobial products. Wear gloves, eye protection, and an N95 respirator to reduce exposure. Your team’s quick coordination helps everyone feel protected and included.
Apply mold prevention techniques by monitoring hidden cavities, checking baseboards, and documenting moisture levels. If materials stay damp, mold can colonize fast, so keep drying until readings return to normal and all surfaces are fully dry.
Find and Fix the Water Source
Find the source within minutes, because mold will keep spreading until you stop the leak or intrusion at its origin.
You should begin with leak detection at fixtures, supply lines, roofs, windows, and appliance connections. Trace stains, damp drywall, warped trim, and musty odors back to the entry point.
Then perform a plumbing inspection to check joints, valves, traps, and hidden pipes for drips or corrosion. If you find an active leak, shut off the water, isolate the area, and repair the defect immediately.
When the source is exterior, seal failed flashing, cracked caulk, or damaged roofing. Use a moisture meter to confirm the problem is resolved, and document each step so your team stays aligned and confident.
Dry Wet Areas the Right Way
You should remove all standing water immediately using a wet vac, mop, or pump, because pooled moisture drives mold growth.
Then increase airflow right away by opening windows, running fans, and using dehumidifiers to lower surface and ambient humidity.
Keep drying until materials are fully dry to the touch and no dampness remains in hidden areas.
Remove Standing Water
Start by removing all standing water with a wet/dry vacuum, pump, or absorbent tools, then discard saturated materials that can’t be fully dried. This standing water removal step limits further absorption into drywall, subflooring, and insulation.
Use targeted water extraction techniques on carpets, baseboards, and low spots until no pooled moisture remains. Check hidden edges, corners, and seams, because leftover water can sustain microbial growth.
If you’re working with a team, assign one person to extract and another to monitor progress so no area gets missed. Move systematically room by room, and confirm each section feels damp, not wet, before you continue.
You’re protecting the space, reducing cleanup time, and keeping your recovery effort on track together.
Increase Airflow Quickly
Open windows, run fans, and position dehumidifiers immediately to move moist air out of the space and accelerate surface drying.
You’ll need to create cross-ventilation by opening opposite openings when weather allows, then aim fans across wet surfaces, not just at one spot.
Use airflow techniques that push air along floors, behind furniture, and into corners where moisture lingers.
Keep interior doors open so air can circulate through the whole affected area, and avoid blocking vents or returns.
If you’re drying drywall, carpet, or framing, maintain steady airflow until readings drop and surfaces feel dry.
Pair these ventilation strategies with continuous dehumidification so humidity stays low.
When you act fast and keep conditions controlled, you help your cleanup crew restore a safer, cleaner space.
Remove Mold-Contaminated Materials Safely
Cut away and discard materials that can’t be cleaned and fully dried, because porous items often hold mold deep within their fibers. You’ll protect your space by bagging contaminated debris in heavy-duty plastic, sealing it before you move it through clean areas.
Wear gloves, eye protection, and a respirator as safety precautions, and keep the work zone isolated. Dampen dusty surfaces lightly to limit spore release, then remove drywall, insulation, carpet, and ceiling tiles with controlled cuts.
Use mold removal techniques that prevent cross-contamination: work from cleaner to dirtier areas, and replace tools or clean them between sections. If you find hidden growth behind trim or under flooring, lift materials carefully so you don’t spread fragments.
Stay methodical, and you’ll help your home feel safe and restored.
When Do You Need Mold Remediation?
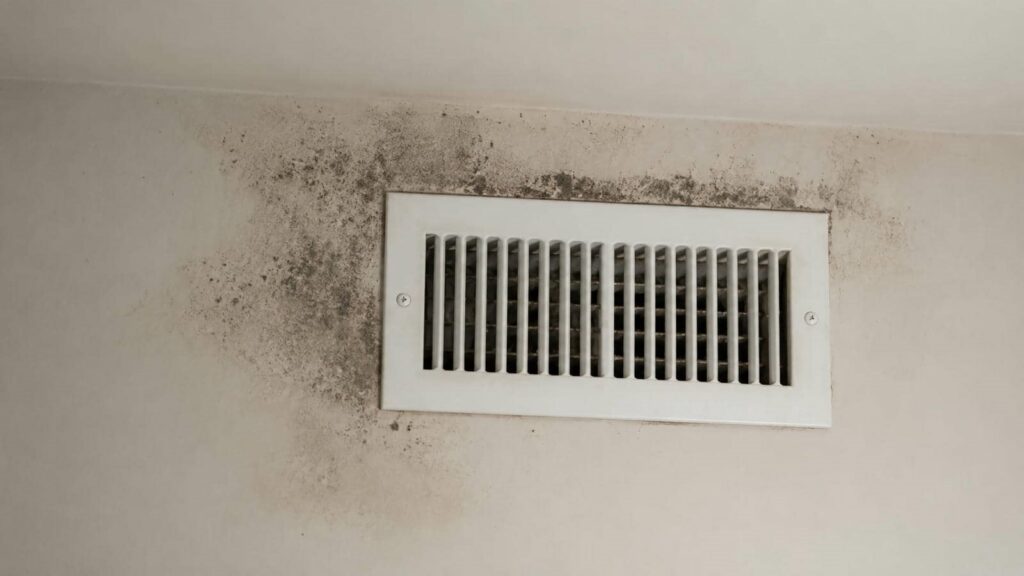
You need mold remediation when you see visible mold growth on walls, ceilings, flooring, or contents.
You should also act if musty odors persist after cleaning, because hidden growth may remain in damp materials or cavities.
If water damage cleanup is delayed, assume mold can start forming within 24 to 48 hours and begin remediation immediately.
Visible Mold Growth
Visible mold growth is a clear warning sign that water damage has created conditions that support fungal development. You should treat any patch, spot, or fuzzy film on drywall, wood, or fabric as a remediation trigger.
Use mold identification techniques to compare color, texture, and spread pattern, then document the affected area with photos and measurements. Assess nearby materials for hidden colonization, because visible growth often indicates broader mold growth conditions such as elevated moisture and poor drying.
If you’re part of a home team or property crew, isolate the area, limit traffic, and avoid disturbing the surface.
Contact a qualified remediation professional promptly so you can protect indoor air quality, reduce structural damage, and restore a safe, healthy space for everyone sharing it.
Musty Odors Persist
If a musty odor lingers after drying, it often signals hidden moisture and active mold growth behind walls, under flooring, or inside HVAC components.
You should treat the smell as a diagnostic clue, not a cosmetic issue. Common musty smell causes include damp insulation, contaminated drywall, and microbial buildup in porous materials.
Inspect areas that stayed wet, and use a moisture meter to verify dryness. If readings stay elevated, you need professional mold remediation.
Effective odor removal techniques start with source elimination, then HEPA vacuuming, controlled dehumidification, and thorough cleaning of affected surfaces.
Don’t mask the scent with fragrances; that only hides the problem. When you address the source, you protect your space and join the group of owners who restore healthy indoor air.
Water Damage Delays
When water damage sits untreated for more than 24 to 48 hours, mold remediation often becomes necessary because moisture can penetrate drywall, insulation, subfloors, and framing.
You should treat every delay as a risk multiplier: hidden dampness raises microbial activity, weakens materials, and complicates cleanup.
Document the affected areas, start drying immediately, and contact a licensed remediation team so you can verify moisture levels and isolate contaminated sections.
Quick action supports accurate insurance claims and keeps restoration timelines realistic.
If you smell persistent mustiness, see staining, or notice warped surfaces after water intrusion, you’re likely past simple drying and into remediation territory.
Acting early helps your home stay safe, and it helps you stay connected to a team that knows how to restore your space correctly.
Clean Moldy Surfaces Properly
Scrub moldy surfaces with a detergent solution and water to remove visible growth before drying and disinfecting the area.
You should work from the cleanest section toward the dirtiest so you don’t spread spores.
Use mold removal techniques that match the material: wipe nonporous surfaces with a damp cloth, and gently agitate textured areas with a soft brush.
Choose safe cleaning products labeled for indoor use, and follow the manufacturer’s dilution instructions exactly.
Keep the surface wet long enough for cleaning, then rinse if directed and dry with clean towels or airflow.
Change cloths often, and discard porous items that stay stained or crumbly.
If you stay methodical, you’ll restore a safer, more comfortable space for everyone in your home.
Do You Need Professional Mold Testing?
Professional mold testing isn’t always necessary, but you may need it when the source of contamination is unclear, the affected area is large, or you suspect hidden growth behind walls, under flooring, or in HVAC components.
You can use testing to confirm whether elevated spore levels persist after drying and cleanup. This helps you verify conditions before you reoccupy the space.
The main mold testing benefits include pinpointing problem areas, documenting exposure concerns, and supporting targeted remediation.
If you’re comparing results, rely on professional assessments, because they use calibrated methods and interpret data in context.
You don’t need testing for every leak, but you should request it when symptoms continue, odors remain, or visible growth returns. That keeps your next steps precise, safe, and aligned with your team.
How to Choose a Mold Remediation Contractor
Once you’ve confirmed the scope of the mold problem, choose a contractor who can document moisture conditions, contain the affected area, and follow a clear remediation plan.
Verify contractor qualifications by checking licensing, insurance, training, and experience with water-damaged structures. Ask for written project estimates that define labor, equipment, containment, removal methods, and verification steps.
You should compare how each bidder explains inspection findings and disposal procedures, not just price. A reliable contractor communicates clearly, answers your questions directly, and respects your need for a safe, orderly process.
Ask whether they use third-party verification for progress checks and final clearance. You’ll feel more confident when the team shows technical competence, documents each phase, and treats your home like a shared responsibility, not just another job.
Prevent Mold After Water Damage
To prevent mold after water damage, dry the structure as quickly as possible and remove wet materials that can’t be fully dried.
You should start dehumidifiers, open concealed cavities, and verify that framing, subfloors, and insulation reach safe moisture levels.
Use mold prevention strategies such as cleaning nonporous surfaces with approved antimicrobial products and discarding porous items that stayed saturated beyond 24 to 48 hours.
Monitor indoor relative humidity with a hygrometer and keep it below 60% using humidity control techniques, including HVAC, exhaust fans, and portable dehumidifiers.
Inspect hidden areas daily for odor, staining, or condensation.
If you act fast and stay methodical, you’ll protect your space and help everyone in your home feel secure, clean, and supported.
Frequently Asked Questions
How Long Does Mold Take to Appear After Water Damage?
Mold can appear within 24 to 48 hours after water damage, depending on water damage factors. You should inspect quickly, dry materials fast, and monitor the mold growth timeline to protect your space and community.
Can I Stay in My Home During Mold Remediation?
You can stay, but you shouldn’t if technicians isolate affected areas or your symptoms worsen. Follow mold safety precautions, seal HVAC, and consider temporary relocation until clearance testing confirms air quality and cleanup’s complete.
Does Homeowners Insurance Cover Mold Remediation Costs?
Usually, yes, but coverage’s a maze: you’ll need your insurance policy details to confirm limits, exclusions, and deductibles. Follow mold prevention tips, document damage, and you’ll protect your home and your place in it.
What Health Symptoms Can Mold Exposure Cause?
You may develop coughing, wheezing, nasal irritation, eye redness, headaches, and skin rashes. Your health risk factors rise with asthma or allergies, so follow mold prevention tips: control moisture, ventilate, and remove contamination quickly.
How Much Does Professional Mold Remediation Usually Cost?
You’ll usually spend $1,500–$6,000 for professional mold remediation, though refined mold removal techniques and prevention strategies can elevate costs. You should expect pricing to reflect affected area size, contamination depth, and required containment protocols.
Conclusion
If you act quickly, you can keep a small moisture issue from becoming a more unwelcome problem. Stop the water source, dry affected areas, and remove any compromised materials safely. If mold remains visible or the damage has spread, bring in a qualified remediation professional. Stay methodical, document each step, and keep your space dry going forward. With prompt, careful action, you can restore a healthier environment and reduce the chance of future growth.
Recent Posts
How to Clean Up Pipe Damage Fast
When a pipe breaks, you need to act fast to limit structural damage and mold
Why Hire Pipe Damage Cleanup Experts?
You need fast cleanup, careful cleanup, and expert cleanup when pipe damage hits your home.
What Pipe Cleanup Experts Do Nearby
When a sewer line backs up in your basement after a heavy rain, nearby pipe