
Contents
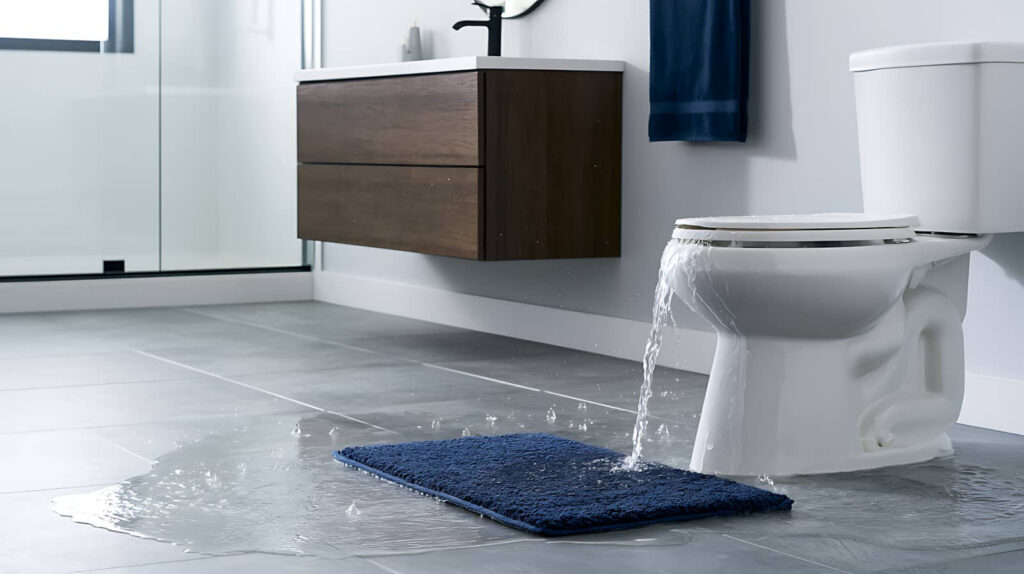
If you’re dealing with an emergency sewage backup, you’re facing more than a mess—you’re confronting contaminated wastewater that can spread pathogens through floors, walls, and hidden cavities. You need immediate isolation, controlled removal, and disinfection by trained responders. The process is exacting, because every exposed surface can remain hazardous long after visible waste is gone. What happens next depends on how far the contamination has spread.
Key Takeaways
- Emergency sewage backup cleanup is the controlled removal of contaminated wastewater, solids, and damaged materials after a sewage overflow.
- It isolates the affected area to limit exposure and spread of harmful contamination.
- The process includes removing unsalvageable porous items, cleaning hard surfaces, and disinfecting all exposed areas.
- Sewage backups can cause gastrointestinal, skin, eye, and respiratory health risks, so affected surfaces are treated as potentially infectious.
- Professional cleanup also addresses hidden damage, moisture, and the cause of the backup to restore sanitary conditions and prevent recurrence.
What Sewage Backup Cleanup Means
Sewage backup cleanup is the controlled removal of contaminated wastewater, solids, and affected materials after a sewage overflow or reverse flow into a structure.
You address sewage hazards by isolating the area, limiting exposure, and restoring sanitary conditions with disciplined cleanup methods.
You must treat every affected surface as potentially contaminated, since pathogens, organic waste, and corrosive residues can persist after visible liquid disappears.
You rely on trained responders to extract waste, remove unsalvageable materials, clean remaining surfaces, and disinfect all impacted areas.
You also need containment, ventilation, and verified drying to reduce secondary contamination.
This process protects occupants, supports compliance, and returns the environment to a safe, usable state through systematic remediation.
Signs You Need Sewage Cleanup
Once you understand what sewage backup cleanup involves, the next step is recognizing when the problem has occurred. You may notice slow drains, gurgling pipes, or water rising in fixtures, but the clearest indicators are unpleasant odors and visible contamination.
If wastewater appears in tubs, toilets, or floor drains, you’re dealing with a sanitary failure that needs prompt attention. Dark stains, damp flooring, and discoloration along baseboards can also signal hidden exposure.
When you experience recurring issues after normal use, the system likely has an obstruction or damage that won’t resolve on its own. You shouldn’t ignore these signs, because they show the environment no longer meets safe standards for your household and community.
What to Do Before Cleanup Begins
Before cleanup starts, you should stop using affected plumbing, keep people and pets away from the contaminated area, and shut off water if ongoing flow is worsening the backup.
Next, document the source, extent, and affected materials for an initial assessment, so you can brief the cleanup team clearly.
Put on safety precautions such as gloves, boots, and eye protection before you enter the area.
If you can do so safely, ventilate the space by opening exterior windows and doors.
Remove nearby belongings that are dry and uncontaminated, and isolate the zone with barriers or tape.
Notify your property manager, landlord, or service provider right away.
These steps help you support a coordinated response and create the conditions for efficient, professional cleanup.
Health Risks From Sewage Backup
After you’ve secured the area and limited access, you need to understand the hazards the backup can create. Sewage contains bacteria, viruses, parasites, and chemical contaminants that can trigger health hazards quickly in contaminated environments.
You and your household may face:
-
Gastrointestinal illness from direct contact or aerosolized particles.
-
Skin, eye, and respiratory irritation from exposure to effluent and splashes.
-
Secondary contamination of clothing, floors, and porous materials that spreads pathogens.
If you enter the space, you increase infection risk, especially with cuts, asthma, or weakened immunity.
You should treat every affected surface as potentially infectious and avoid eating, drinking, or touching your face nearby.
Prompt awareness helps your team protect one another and maintain a safer, more controlled recovery.
The Sewage Cleanup Process
Start the cleanup by shutting off the sewage source if you can do so safely, then document the damage with photos before any removal begins.
You then isolate the affected area to limit sewage contamination and protect adjacent surfaces.
Next, you remove porous items that can’t be reliably sanitized, such as carpet padding and damaged insulation, while keeping salvageable materials separate.
Use approved cleanup techniques to clean hard surfaces with detergent and a disinfectant rated for biohazard exposure, following labeled contact times.
Inspect hidden cavities, baseboards, and joints for residue that can harbor pathogens.
Finally, verify that all exposed areas are visibly clean and ready for professional assessment.
This method helps your household restore order efficiently, while supporting everyone who shares the space.
Removing Standing Water and Drying
You should pump out all standing water immediately to reduce contamination spread and limit structural damage.
Then you should dry affected surfaces with appropriate extraction and wiping methods, ensuring materials don’t remain saturated.
After that, you should dehumidify and ventilate the area to accelerate moisture removal and inhibit microbial growth.
Pump Out Standing Water
Pump out all standing water as soon as the area is safe to access, using a submersible pump, wet vacuum, or extraction equipment rated for contaminated water. Your water removal plan should prioritize sewage extraction from low points, sump areas, and trapped pockets so you can reduce exposure quickly and keep your crew aligned.
Shut off nearby electricity before you begin.
- Verify equipment integrity and discharge routing.
- Remove liquid steadily to avoid spreading contamination.
- Track volume removed for incident records.
You should work methodically, maintain containment, and keep hoses secured to limit splashing.
If the water level drops unevenly, reposition the intake and continue until only a thin residue remains. This step creates the controlled conditions your team needs for the next phase and supports a safer, more coordinated recovery effort.
Dry Affected Surfaces
With standing water removed, dry all affected surfaces immediately to slow microbial growth and reduce lingering contamination. You should wipe floors, baseboards, walls, and fixtures with clean, absorbent materials until no visible moisture remains.
Focus on porous trim, seams, and low points where residue can persist. Apply moisture control by checking hidden edges, cabinet bottoms, and subfloor openings, because trapped dampness can compromise cleanup quality.
If sewage contacted building materials, perform surface treatment only after drying removes bulk moisture, so disinfectants can contact the surface evenly. Use gloves and other protective measures while you work, and inspect each area methodically.
When you dry every exposed surface, you support a safer environment and help your space return to normal with confidence.
Dehumidify And Ventilate
Open windows, run exhaust fans, and place dehumidifiers in the affected area to remove residual moisture and accelerate drying. You should verify that standing water’s gone, then apply dehumidification techniques that maintain low relative humidity and prevent secondary contamination.
Use ventilation methods that direct humid air outdoors, not into adjacent rooms, so your work area stays contained and your team stays protected.
- Position dehumidifiers centrally for maximum airflow.
- Keep fans moving air across walls, floors, and baseboards.
- Monitor moisture levels until materials return to safe dryness.
You’ll support faster recovery when you combine continuous airflow, controlled humidity, and disciplined monitoring.
This process helps you protect your space, restore confidence, and move forward with a cleaner, safer environment together.
Cleaning Contaminated Floors and Walls
Begin by removing all standing water and solid waste from the affected floors and walls. Then wash the surfaces with a detergent solution to lift remaining soil and residue.
You should identify contamination sources before you scrub, so you can target the heaviest deposits first. Use cleaning techniques that agitate seams, baseboards, and textured finishes without spreading effluent to clean areas.
Rinse thoroughly, then apply an EPA-registered disinfectant at the labeled contact time to reduce pathogenic risk. If porous finishes remain visibly stained or soft, you need to remove and replace them.
You’ll protect your space and the people in it when you keep tools separate, change gloves often, and verify that the surfaces are visibly clean, dry, and free of odor before reentry.
Cleaning Sewage in Crawl Spaces
A crawl space contaminated by sewage demands controlled access and methodical cleanup, because low clearance, exposed insulation, and limited ventilation can trap pathogens and spread contamination.
You protect your team by wearing PPE, isolating the entry point, and removing saturated debris with sealed containers. Then you clean hard surfaces with approved disinfectant and verify full contact time.
- Inspect for pooling, structural hazards, and hidden waste.
- Remove contaminated insulation, vapor barrier, and disposable materials.
- Support crawl space maintenance by drying the area and controlling sewage odor.
You should document each step, because accurate records help you stay compliant and keep your property group informed.
When you work together, you reduce risk, restore access, and reestablish a sanitary crawl space with confidence.
When Water Damage Repair Is Needed
When sewage backup has entered walls, floors, insulation, or framing, you need water damage repair in addition to cleanup, because moisture left in place can weaken materials and support mold growth, corrosion, and odor retention.
You should inspect hidden cavities, measure moisture, and remove damaged finishes before they trap contamination. Your repair options may include drying, structural material replacement, antimicrobial treatment, and reinstallation of drywall, trim, or flooring.
If you act promptly, you’ll protect the building envelope and restore sanitary conditions. When you work with qualified professionals, you stay aligned with health and code expectations and reduce the chance that concealed water damage spreads.
You deserve a space that’s clean, stable, and fit for normal use, and targeted repair helps you get there.
How to Prevent Another Backup
To prevent another sewage backup, you should identify and correct the source of the blockage, such as tree-root intrusion, grease buildup, collapsed piping, or a failing sewer lateral. You’ll protect your property when you follow a disciplined maintenance plan and keep your system within safe operating limits.
-
Schedule routine inspections to detect defects before they escalate.
-
Perform preventive maintenance by cleaning lines, clearing obstructions, and servicing traps.
-
Document repairs and monitor recurring symptoms, including slow drains, gurgling, or odors.
You should also avoid flushing wipes, hygiene products, or fats.
If you live in a shared building, coordinate with neighbors and management so everyone supports the same standard.
With consistent care, you can reduce risk and stay confident that your system’s working as it should.
Frequently Asked Questions
How Long Does Emergency Sewage Cleanup Usually Take?
You’ll usually see emergency sewage cleanup take 4 to 24 hours, depending on contamination, access, and drying needs. Longer cleanup duration reduces health risks, and you can expect your team to prioritize safety and containment.
Does Insurance Cover Emergency Sewage Backup Cleanup?
Yes, your insurance policies may cover emergency sewage backup cleanup, but coverage limits vary widely. You’ll need to review exclusions, endorsements, and deductibles carefully, then confirm claim requirements with your insurer before service begins.
Can I Stay in My Home During Sewage Cleanup?
You can stay only if the contamination’s contained, airflow’s controlled, and you follow safety precautions. Otherwise, health risks rise fast. You’ll need professional clearance, isolation, and PPE before reoccupying any affected area.
What Equipment Do Professionals Use for Sewage Cleanup?
You’ll see pros use pumps, extractors, air scrubbers, dehumidifiers, HEPA vacuums, disinfectants, and full PPE for sewage removal. They’ll control health risks, sanitize surfaces, and restore your space with careful, precise procedures.
How Much Does Emergency Sewage Backup Cleanup Cost?
Costs vary widely, like shifting tides. You’ll typically pay $2,000-$10,000, depending on cost factors such as contamination level, affected area, and damage extent. Professional cleanup services can reduce risk and help you feel supported.
Conclusion
Emergency sewage backup cleanup is the reset button for your property after contamination. You need fast isolation, controlled extraction, and thorough disinfection to stop health hazards from spreading. Every affected surface should be treated as hazardous until it is verified safe. If you act quickly and use trained professionals, you reduce damage, protect indoor air quality, and restore sanitary conditions. Don’t wait; sewage problems escalate like a wildfire in a confined space.
Recent Posts
3 Tips for Sewage Backup Water Damage Repair
When sewage backs up, you need to stop the flow fast, shut off the affected
Emergency Sewage Cleanup: How-To Guide
Sewage cleanup is both a routine task and a biohazard emergency. You need to stop
What Causes Standing Water Under Homes?
You may not realize that standing water under your home usually starts with a drainage