Contents
Broken pipe damage can turn your home into a fast-moving tide, and you need to act before the damage spreads. Shut off the water supply right away, then check for electrical hazards, hidden moisture, and structural issues. Move furniture and valuables to dry areas, call an emergency plumber if needed, and start removing standing water. If you want to avoid mold, repairs, and insurance setbacks, the next steps matter.
Key Takeaways
- Shut off the water immediately at the main valve to stop further flooding and damage.
- Turn off power in affected areas if water is near outlets, panels, or appliances.
- Move furniture, electronics, and valuables to a dry area and protect items you cannot relocate.
- Call an emergency plumber and begin pumping, vacuuming, and drying standing water.
- Inspect for hidden damage, remove unsalvageable materials, clean thoroughly, and repair damaged structures.
Shut Off Water Fast
The first step is to shut off the main water supply immediately to stop more water from escaping the broken pipe.
Locate your water shutoff valve, turn it clockwise, and confirm the flow has stopped at every fixture. If you share the building, alert others so no one restores pressure by mistake.
Then follow emergency procedures from your home plan and keep the path to the valve clear for future access. Use a flashlight if the area’s dark, and don’t force a stuck valve; call maintenance or a licensed plumber if it won’t move.
You’re doing the right thing by acting fast, because quick isolation limits damage and keeps your household aligned.
After the water shutoff, stay calm and prepare for the next repair step.
Inspect Water Damage and Safety Risks
Check for hidden moisture behind walls, under flooring, and in insulation, since visible drying can mask ongoing saturation.
You should also inspect outlets, cords, and electrical panels for water exposure before restoring power.
If you find damp materials near electrical components, keep the area de-energized and arrange a qualified inspection.
Hidden Moisture Checks
Once you stop the visible leak, inspect nearby surfaces for hidden moisture before you repair anything else. You can use moisture detection tools, but your hands and eyes still matter: press drywall, baseboards, trim, and flooring for soft spots, swelling, or cool dampness.
Check behind furniture, under sinks, and along pipe runs where hidden leaks often spread quietly. If you find wet insulation, stained paint, or musty odor, mark the area and keep it open for drying.
Remove only damaged materials you can safely reach, and bag debris to keep the space orderly. This step protects your home and helps your crew work with confidence, because you’re catching problems before they worsen.
Electrical Safety Hazards
If water has reached outlets, switches, appliance cords, or your breaker panel, treat the area as a live electrical hazard until a qualified electrician clears it.
Turn off power at the circuit breaker only if you can reach it safely from a dry location. Don’t touch wet devices, metal faceplates, or standing water near energized equipment.
You should also confirm proper electrical grounding, because damaged grounding can let current travel through framing, pipes, or flooring.
Keep everyone out of the affected zone and post a clear warning so your household stays protected together.
Document visible corrosion, scorch marks, tripped breakers, and buzzing sounds, then report them during the inspection.
If you smell burning or hear crackling, leave immediately and call emergency services.
Move Furniture and Valuables
Start by clearing nearby furniture to open access to the damaged area and reduce further exposure to moisture.
Move upholstered items, electronics, and other valuables to a dry location as soon as you can.
If an item can’t be relocated safely, raise it off the floor and cover it with a waterproof barrier.
Clear Surrounding Furniture
Move furniture, rugs, electronics, and other valuables away from the affected area as soon as you spot the leak. Keep a clear path so you can work safely and avoid spreading moisture.
Lift items, don’t drag them, to reduce floor damage and strain. Group pieces in a dry room or hallway, then check each item for wet edges, staining, or swelling. That quick damage assessment helps you decide what needs cleaning, drying, or disposal.
Use felt pads, plastic blocks, or foil sheets for temporary furniture protection if you must leave anything nearby. Turn pieces upside down only when stable, and keep cords unplugged.
Protect Valuables Quickly
Once the area is clear, protect anything valuable before moisture spreads farther.
You should do a quick assessment of each room and move electronics, documents, artwork, and small heirlooms to a dry, elevated space. Use sealed bins, plastic wrap, or clean towels for valuable protection when you can’t relocate items immediately.
Keep furniture legs off wet flooring with blocks or foil if needed, and don’t drag heavy pieces across saturated surfaces. Work from the driest zone outward so you avoid tracking water.
If you spot swelling, staining, or electrical exposure, stop and call a professional right away. Acting fast helps you stay in control, limits loss, and keeps your home’s important belongings protected while recovery begins.
Call an Emergency Plumber
If the broken pipe is leaking heavily, bursts have affected multiple areas, or you can’t isolate the water supply, call an emergency plumber right away.
You need fast, licensed help to stop pressure loss and limit structural damage. Use your emergency contacts list, then give the plumber exact details so they can prepare the right plumbing tools and parts.
- State where the break started
- Describe the leak rate and sounds
- Report visible corrosion or split joints
- Mention any shutoff valve problems
- Keep the area accessible for service
You’re not handling this alone; skilled responders work with you to restore control.
Stay near your phone, answer follow-up questions, and follow their instructions exactly.
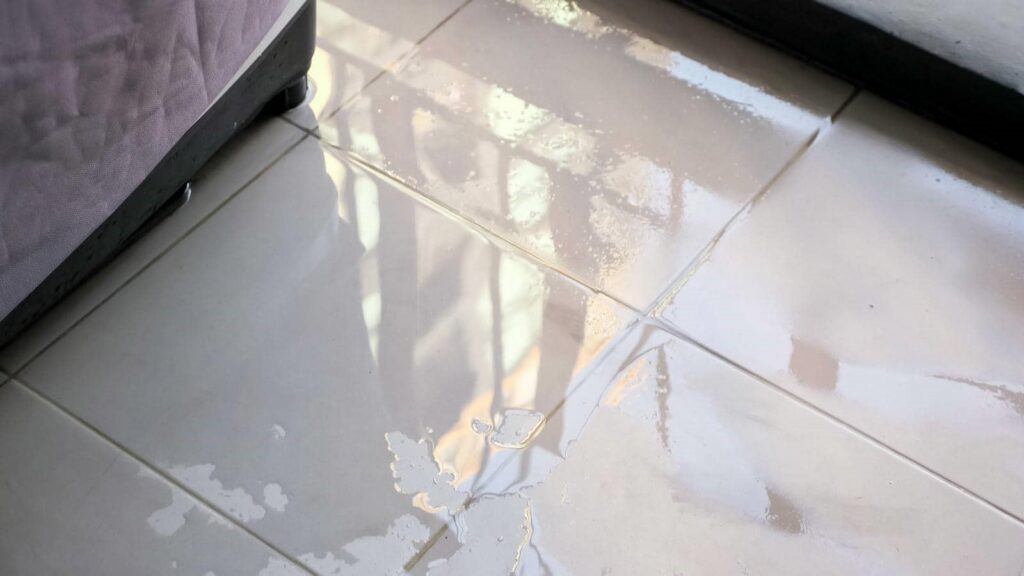
Dry Out Standing Water
Tackle standing water right away to limit mold, floor warping, and hidden moisture damage. You should first shut off power in affected areas, then use water removal techniques like pumps, wet vacuums, and towels to clear pooled water from floors, carpets, and low spots.
Move furniture, rugs, and baseboards if you can do so safely. Next, set up drying equipment options such as air movers, dehumidifiers, and box fans to increase airflow and pull moisture from surfaces and the air.
Open windows only if outdoor air is dry. Check subfloors, wall edges, and trim for dampness, because trapped water can linger. Keep working until materials feel dry and indoor humidity drops to a stable level.
Prevent Mold After Pipe Leaks
After you’ve removed standing water, act quickly to stop mold from taking hold. You need fast mold prevention: open windows, run exhaust fans, and keep air moving across damp surfaces.
Use a dehumidifier to support humidity control and target indoor levels below 60%. Remove wet drywall, insulation, or carpet padding that can’t dry within 24 to 48 hours. Clean hard surfaces with detergent and dry them completely.
Check hidden spots behind baseboards, under sinks, and inside cabinets, where moisture can linger and spread.
- Ventilate the room
- Dehumidify continuously
- Discard saturated porous materials
- Clean and dry surfaces
- Monitor moisture daily
You’re protecting your home and your crew by staying disciplined.
Photograph Damage for Insurance
Before you clean up further, photograph every part of the damage for your insurance claim. Use your phone or camera to capture wide shots of each affected room, then move in for close-ups of the pipe, flooring, walls, furniture, and visible staining.
Include timestamps if your device supports them. Keep the image file names organized so your documentation process stays clear and easy to follow. Take photos from multiple angles, and don’t move damaged items unless you need to record their condition first.
If water reached adjacent rooms, document those areas too, since insurance claims often depend on showing the full extent of loss. Back up the photos to cloud storage or email them to yourself right away. You’ll build stronger proof and feel more confident with your crew.
Clean and Sanitize the Area
Start cleanup by removing standing water, then wash affected surfaces with soap and warm water to lift dirt and residue.
Use sturdy cleaning supplies, including gloves, buckets, sponges, and microfiber cloths, so you can work safely and efficiently. Focus on high-touch areas first, and keep the room well ventilated while you clean.
- Remove damp debris and disposable items
- Scrub visible grime from hard surfaces
- Rinse with clean water after washing
- Apply approved sanitizing methods to disinfect
- Let surfaces dry completely with airflow
You’re part of a home recovery process that works best when you stay methodical.
Check labels before mixing products, and don’t combine chemicals. If the area still smells musty or feels slick, repeat the cleaning and sanitizing steps until it’s fully addressed and safe.
Repair Floors, Walls, and Ceilings
Once the area is dry and sanitized, inspect floors, walls, and ceilings for warping, staining, soft spots, or loose materials that show water intrusion.
Remove damaged drywall, insulation, trim, and baseboards before mold can spread. If subflooring is swollen or delaminated, replace it; don’t cover it.
Match new floor materials to the existing assembly so height and load stay consistent. For wall treatments, cut back to solid framing, dry cavities fully, then reinstall with moisture-resistant board where needed.
Check ceiling joists and panels for sagging, then secure or replace compromised sections.
Prime repaired surfaces, seal joints, and repaint with compatible products.
You can restore a clean, safe space that feels solid again when every repair is done carefully and in order.
Frequently Asked Questions
How Do I Tell if My Pipe Burst Is Covered by Insurance?
Check your policy’s pipe coverage for sudden, accidental bursts; then document damage, note exclusions, and file insurance claims promptly. If the pipe failed from wear, neglect, or freezing without safeguards, you may not be covered.
Should I Shut off Electricity After a Pipe Breaks?
Yes, you should shut off electricity if water’s near outlets, fixtures, or the panel. Follow emergency procedures, protect electrical safety, and call a licensed electrician. You’re acting wisely, and your home’s safer this way.
Can I Use a Wet Vacuum for Small Water Leaks?
Yes, you can use a wet vacuum for small leaks; it offers wet vacuum advantages by quickly removing water and supporting leak detection. You’ll limit spread, inspect hidden moisture, and protect your space with confidence.
How Soon Should I Call My Insurance Company?
Call your insurance company immediately after you stop the leak and document damage. Early reporting speeds insurance claims, protects coverage, and lets you coordinate pipe repair before secondary damage worsens.
Will a Broken Pipe Affect My Water Quality?
Yes—a broken pipe can taint your water like a crack in a trusted shield. You’ll need testing for water contamination, then pipe repair, before you drink or cook with that supply.
Conclusion
When a pipe bursts, the key theory is simple: the faster you stop the water, the less damage you’ll face. Shut off the supply, check for electrical and structural hazards, and move belongings to dry space. Then call an emergency plumber, remove standing water, and dry the area completely to prevent mold. Don’t forget to photograph damage for insurance, then clean, sanitize, and repair surfaces so you can restore the space safely.
Recent Posts
How to Handle Broken Pipe Cleanup
When a supply line bursts behind your kitchen wall, you need Sewage Cleanup Experts for Pipe Repairs to shut
5 Tips for Sewage Cleanup After Pipe Damage
When a pipe bursts, the mess can spread like ink in water, fast and without
Why Pipe Leaks Need Immediate Restoration
When you spot a pipe leak, you can’t treat it like a minor nuisance. Water