
Contents
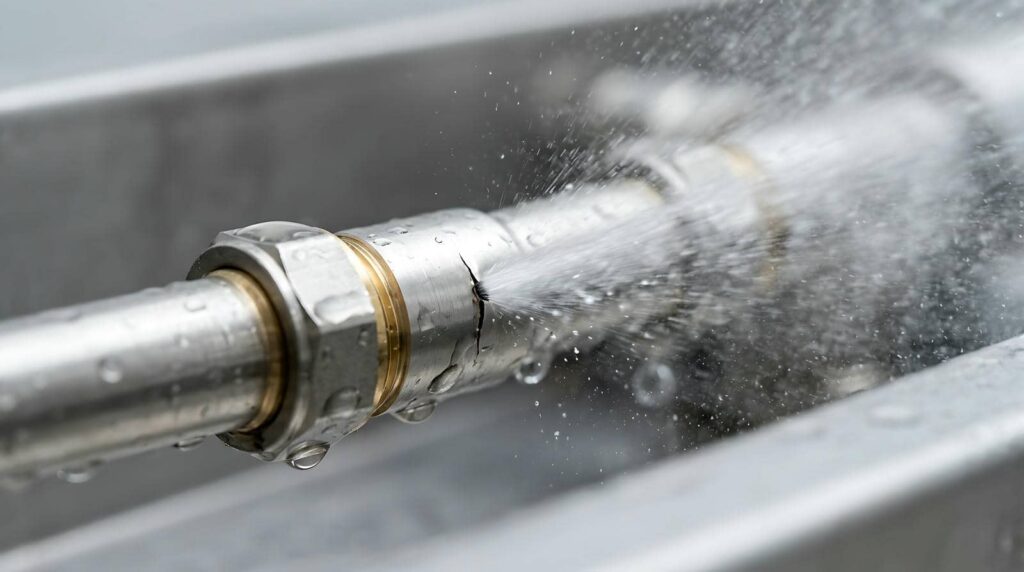
When a pipe breaks, the drip can become a warning bell for everything below it. You need Pipe Leak Cleanup to shut off the water and power first, then assess the damage, remove standing water, and dry the area as quickly as possible. Clean and disinfect exposed surfaces, check for hidden moisture, and document everything for insurance. From there, you can decide what needs repair now and what you can do to keep the next leak from winning.
Key Takeaways
- Shut off the main water supply immediately and turn off nearby electrical circuits if water has reached outlets or appliances.
- Inspect ceilings, walls, floors, and cabinets for hidden moisture, soft spots, staining, and potential mold growth.
- Remove standing water quickly with towels, mops, or a wet/dry vacuum, then use fans and dehumidifiers to dry surfaces.
- Clean and disinfect all wet surfaces, especially sewage-contaminated areas, and keep humidity below 60% to prevent mold.
- Document all damage with photos, notes, and receipts, then contact a plumber or restoration team for repairs and long-term prevention.
Assess Pipe Leak Damage
Before you clean up, you need to assess the pipe leak damage so you can act fast and avoid worsening the problem. Start with leak detection: inspect ceilings, walls, floors, and nearby cabinets for drips, staining, swelling, or soft spots.
Check how far moisture has spread by feeling surfaces and noting temperature changes. Perform a damage assessment by identifying affected materials, visible mold risk, and any warped or weakened structural components.
Document every area with photos and brief notes so you can share clear details with your repair team. If water has reached insulation, drywall, or flooring seams, mark those zones for priority drying.
You’re not handling this alone; a careful survey helps your crew stay organized, protect the space, and restore it safely and efficiently.
Shut Off Water and Power
Once you confirm the leak source, shut off the main water supply immediately to stop more flooding and reduce pressure on the damaged pipe.
Use your water shutoff valve, and if it’s stuck, don’t force it; call building maintenance or a plumber.
Next, cut power to affected circuits at the breaker if water’s near outlets, appliances, or wet floors.
Never touch electrical panels with wet hands or while standing in moisture.
Keep your emergency contacts list handy so you can reach your utility provider, landlord, or plumber fast.
If you share the space, let everyone know what you’ve done so they can avoid hazards and stay aligned.
Quick action helps your team protect the property, reduce risk, and move confidently into cleanup.
Remove Standing Water
Start removing standing water as soon as the area is safe, using a wet/dry vacuum, mop, towels, or a pump for deeper pooling. You’ll lower standing water hazards and keep the cleanup moving with the right water extraction methods.
Work from the outer edges toward the center so you don’t spread contamination. Empty tools often, and keep a steady pace.
- Use a wet/dry vacuum for broad, shallow water.
- Wring towels into a bucket to capture residue.
- Mop small areas with controlled strokes.
- Pump deeper pools before they migrate.
Check low spots, thresholds, and corners where water hides. Stay methodical, and you’ll support the whole team’s recovery effort.
The faster you extract water, the less stress you’ll face and the more controlled the job stays.
Dry Walls, Floors, and Cabinets
After you’ve removed the bulk of the standing water, dry the affected walls, floors, and cabinets right away to limit swelling, staining, and hidden moisture damage.
You should open cabinet doors, remove toe-kicks if you can, and use fans plus dehumidifiers to move air across every wet surface.
Focus on drying techniques that pull moisture from seams, baseboards, and corners where dampness lingers.
Check for soft drywall, buckled flooring, or swollen cabinet panels, and keep airflow steady until readings drop.
If you find insulation materials behind walls that stayed wet, contact restoration services quickly so they can assess removal or replacement.
You’ll protect your space better when you dry thoroughly, verify moisture levels, and restore moisture barriers before rebuilding.
Clean and Disinfect Surfaces
Clean all hard surfaces with soap and water, then apply an appropriate disinfectant to sanitize them after a pipe leak.
You should also check for hidden moisture in seams, trim, and cabinet interiors, since trapped water can keep damage active.
Dry those areas completely to help prevent mold growth and recurring contamination.
Sanitizing Hard Surfaces
Wipe hard surfaces with a detergent or soap solution first to remove residue, then apply a disinfectant that’s safe for the material and follow the label’s contact time. You’ll protect your space and keep your team aligned by using proven sanitizing techniques for each surface materials type.
Focus on high-touch zones and match products to the finish to avoid dulling or corrosion.
- Use microfiber cloths to lift film.
- Test cleaners on a hidden spot.
- Keep a clean-to-dirty wiping order.
- Rinse only when the label requires it.
After contact time, wipe away excess and inspect for streaks or missed spots. If a surface still feels tacky, repeat the process with fresh solution.
Consistent care helps you restore a safe, welcoming environment fast.
Drying Hidden Moisture
Even after you disinfect exposed surfaces, trapped moisture can keep feeding odor, mold, and material damage, so you need to dry concealed areas fast.
Use moisture detection tools to check baseboards, subfloors, wall cavities, and cabinet voids, not just the visible spill zone.
Pull off toe kicks or access panels if you can, and increase airflow with fans and dehumidifiers aimed at wet assemblies.
Lift rugs, padding, and furniture contacts so air can reach both sides.
Rotate drying techniques: direct air across surfaces, then verify progress with repeated readings.
If the structure still feels cool or damp, keep drying until measurements stabilize.
You’re protecting your space and helping everyone in it recover quickly, cleanly, and with confidence.
Preventing Mold Growth
Once the area is dry, scrub all affected nonporous surfaces with soap and water, then apply an EPA-registered disinfectant to help stop mold from taking hold. You’ll protect your space faster when you act now and stay consistent.
Use these mold prevention strategies:
- Wear gloves and eye protection.
- Rinse dirt before disinfecting.
- Keep fans running during cleanup.
- Check hidden joints for residue.
After cleaning, inspect nearby walls, trim, and flooring for staining or odor. Keep humidity below 60% with humidity control techniques, and replace soaked porous materials that can’t be fully cleaned.
If you’re with a crew or family, assign checks so no damp spot gets missed. Clean surfaces, verify dryness, and monitor for new growth daily.
Watch for Sewage and Biohazards
If the leak involves sewage, treat it as a biohazard and isolate the area right away.
You should wear gloves, eye protection, and a mask before handling any contaminated material.
Then disinfect all affected surfaces with an approved disinfectant and replace anything that can’t be safely cleaned.
Identify Sewage Contamination
When a pipe leak involves sewage, treat the area as contaminated and keep out of direct contact with the water, since it can carry bacteria, viruses, and other biohazards.
You can spot sewage contamination fast by checking for sewage odors, discoloration, and solids near the leak. Look for contamination sources such as toilet backups, floor drains, or cross-connected lines.
- Dark, cloudy water
- Grease or paper debris
- Gurgling drains nearby
- Persistent sour smell
If you notice any of these signs, isolate the zone and assume the leak isn’t clean water. That mindset helps you protect your crew and stay aligned with proven cleanup practices.
Document what you see, note where the water spread, and move on only when you’ve confirmed the source.
Wear Protective Gear
After you’ve identified possible sewage contamination, put on the right protective gear before you touch anything in the area. Choose protective clothing that covers your arms, legs, and shoes, and add waterproof gloves that fit securely.
Wear safety goggles to keep splashes and aerosol droplets out of your eyes. If you expect airborne contamination, use a respirator rated for biohazards, and make sure it seals properly.
Keep your gear on until you finish handling wet materials, because contaminated surfaces can transfer pathogens fast. If anything tears or becomes soaked, replace it right away.
You’re not overreacting—you’re protecting your team, your home, and your health. When everyone follows the same safety standard, cleanup feels more controlled and you stay ready for the next step.
Disinfect Affected Areas
Use a disinfectant that’s labeled for sewage or biohazard cleanup, and mix it exactly as directed by the manufacturer. Apply it to every wet surface after you’ve removed standing water and debris. You’re protecting your space and the people in it, so don’t skip corners, baseboards, or hidden seams.
Keep the area ventilated, and let the product stay wet for the full contact time.
- Wear gloves and eye protection
- Use clean mops, buckets, and other cleaning supplies
- Follow approved disinfection methods for porous and nonporous materials
- Replace anything that can’t be fully sanitized
If sewage touched the leak, treat the area as contaminated. Wash hands afterward, and bag waste separately. This keeps your cleanup team safe and confident.
Check for Hidden Moisture
Even if the visible leak is small, moisture can spread into wall cavities, flooring, and insulation, so you need to inspect beyond the obvious wet area.
Use moisture detection tools, like a pin meter or thermal camera, to confirm whether hidden leaks remain in drywall, subfloors, or trim.
Check baseboards, under cabinets, and around pipe penetrations for soft spots, staining, or a musty smell. Press gently on materials; if they feel spongy, they’re likely retaining water.
Remove access panels and lift loose flooring edges when you can do so safely.
Keep airflow moving with fans and dehumidifiers until readings return to normal.
Document Damage for Insurance
Before you start repairs, document every part of the damage for your insurance claim. Take wide shots, then close-ups that show stains, warped materials, and the leak source. Use your phone’s timestamp and keep files in one folder so your damage assessment stays organized.
Your team can track the loss faster when you record details now.
- Photograph each affected room from multiple angles
- Capture water lines, discoloration, and pooling
- Note dates, times, and odors
- Save receipts for cleanup supplies and services
Write a brief log of what you found, who you spoke with, and when you noticed it. Share clear copies with your insurer, and keep backups.
That way, you stay prepared, confident, and connected through the claims process.
Repair or Replace Damaged Materials
Once you’ve documented the damage, assess each affected material and decide whether you can dry it out, clean it, and restore it, or whether replacement is the safer option.
For drywall, insulation, and baseboards, compare repair methods against replacement options using cost considerations and material choices. If the material swells, delaminates, or holds odor, replace it.
If you’re unsure, get professional assistance; a pro can confirm hidden damage and help with insurance claims. You can handle small jobs with DIY techniques, but only when the structure is sound and the finish can be matched cleanly.
Choose long term solutions, not quick patches, so your space feels solid again and you stay confident in the fix. Keep records of what you removed, repaired, and bought for the claim file.
Prevent Future Pipe Leaks
To reduce the chance of another leak, inspect exposed pipes regularly for corrosion, loose joints, and small drips, and tighten or replace worn fittings as soon as you spot them.
Build a routine of regular maintenance and seasonal checks so you catch stress before it spreads.
- Add pipe insulation in cold zones.
- Monitor water pressure and test valves.
- Match pipe materials to your system.
- Use leak detection, humidity control, and professional inspections.
Keep emergency kits nearby so your household can act fast if trouble starts.
When you plan valve upgrades, choose reliable parts that fit your lines and your budget.
Frequently Asked Questions
How Do I Know if Mold Is Already Growing Behind Walls?
You might notice musty odors, discoloration, bubbling paint, warped drywall, or persistent dampness. For reliable mold detection, perform a careful wall inspection, especially near leaks, and call a professional if you suspect hidden growth.
Can I Safely Use a Regular Fan on Wet Electrical Outlets?
No, you shouldn’t use a regular fan on wet electrical outlets; fan safety matters, and electrical hazards can shock you. Kill power, keep clear, and call a qualified electrician before you dry anything.
What Tools Help Detect Moisture Inside Sealed Cabinets?
Moisture meters and thermal imaging are your best tools; they’re the flashlight in a dark cabinet. You can probe hidden dampness, confirm leaks, and track drying fast without opening every panel.
Should I Throw Away Food Stored Near a Leaking Pipe?
Yes, you should toss any food touched by leak water or stored in damp packaging. You’ll protect food safety and reduce contamination risk. Clean, dry the area fast, and inspect pipes for leak prevention.
How Long Does Insurance Usually Take to Approve Water Damage Claims?
Usually, you’ll wait 1–4 weeks—insurance loves suspense. Your claim process speeds up if you provide the insurance adjuster with complete documentation; delays come from coverage limits reviews, missing photos, and policy fine print.
Summary
By following these steps, you can turn a pipe leak from a major setback into a manageable repair. You’ll shut off water and power, remove standing water, and dry every affected surface. You’ll also clean, check for hidden moisture, and document damage so your insurance claim stays accurate. If materials are warped or moldy, replace them promptly. Most importantly, you’ll inspect your plumbing regularly, because the best cleanup is the leak you catch early.
Recent Posts
7 Tips for Home Water Damage Assessment
Could a quick visual check reveal water damage before it spreads? Water damage assessment starts
7 Home Water Damage Assessment Tips
Could a quick visual check reveal water damage before it spreads? Water damage assessment starts
10 Best Home Water Damage Assessment Tips
If you suspect water damage, you need to move quickly and assess it methodically. Home