
Contents
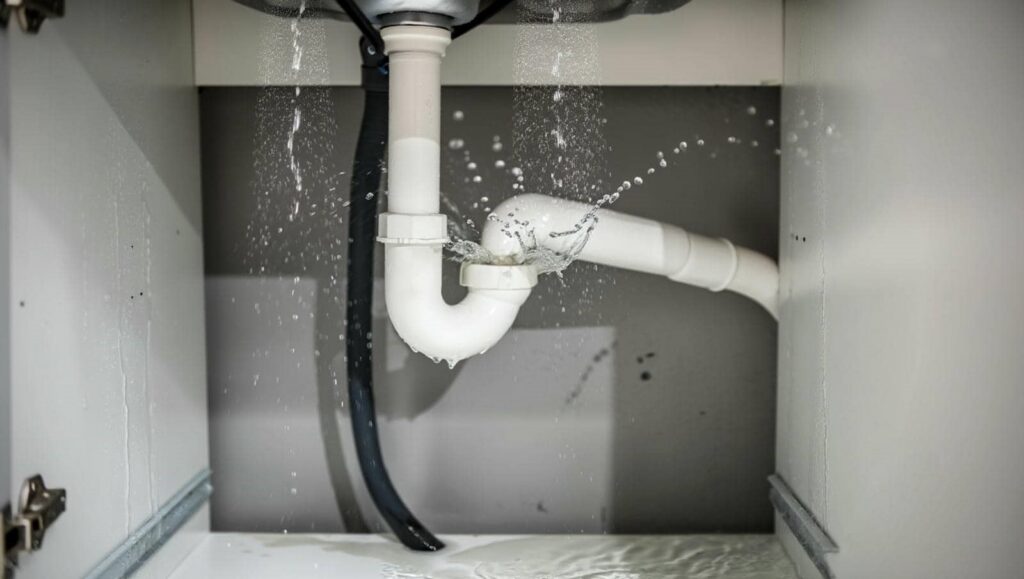
Pipe damage can turn a small leak into a major cleanup fast. You need to stop the water, check for storm-related damage, and remove standing water before it spreads. Then dry hidden cavities, disinfect the affected area, and decide whether the pipe needs repair or replacement. If you miss one damage cleanup step, you could face bigger structural problems than the original break.
Key Takeaways
- Shut off the main water supply and relieve pressure by opening nearby faucets immediately.
- Dry and inspect the damaged pipe, then apply a temporary rubber patch and clamp if needed.
- Remove standing water quickly using pumps, wet vacs, and absorbent pads.
- Sanitize affected areas, discard soaked porous materials, and dry walls and floors with fans and dehumidifiers.
- Document damage, check hidden moisture, and repair or replace damaged pipe sections promptly.
Stop the Water and Secure the Pipe
First, shut off the main water supply to stop the leak from spreading. Then, open nearby faucets to drain pressure from the line.
Next, dry the pipe exterior and inspect the damaged section for a clean break, split, or loose joint. You can wrap the area with a rubber patch and hose clamp for temporary solutions until you get a permanent repair.
If you have a valve, close it fully and label it for easy access later. Support the pipe with brackets or blocks so it doesn’t sag or shift.
Good pipe maintenance starts with stable, dry lines and quick isolation. Stay calm; you’ve got a clear first move, and your team can handle the rest safely and efficiently.
Inspect Storm Water Damage
Once the water is under control, inspect the area for storm water intrusion, since heavy rain or flooding can weaken pipes, joints, and surrounding materials.
You should check walls, floors, ceilings, and pipe runs for stains, swelling, rust, or separated seals. Use storm water inspections to trace where runoff entered and whether it traveled behind finishes or into framing.
Document each issue with photos and notes so your damage assessment stays accurate and your crew can work from the same facts.
Look for cracked caulk, shifted fittings, or damp insulation near the leak path. If you spot structural movement or recurring wet areas, mark them for repair.
Staying thorough here helps your team move forward together with confidence and avoids missed damage.
Remove Standing Water and Contaminants
Next, you need to extract all standing water as quickly as possible to limit further damage and reduce moisture buildup.
Use pumps, wet vacs, or extraction equipment to remove water from floors, walls, and hidden cavities.
Once the area’s dry, you should sanitize all affected surfaces to eliminate contaminants and reduce the risk of mold and bacteria growth.
Quick Water Extraction
When water starts pooling after a pipe failure, you need to remove it fast to limit structural damage and stop contaminants from spreading.
Start your emergency response by shutting off the source, then use water extraction methods suited to the volume: a wet vac for small areas, a submersible pump for deeper water, and absorbent pads for thin films.
Work from the outer edges toward the center so you don’t push dirty water into clean zones. Check carpet, baseboards, and low spots as you go, because trapped moisture can hide there.
Keep hoses routed outside the structure and empty recovery tanks often.
If you’re part of the cleanup team, move quickly, communicate clearly, and keep the work area controlled.
Sanitize Affected Areas
After you remove the standing water, clean and disinfect every affected surface to stop mold growth and reduce contamination.
You should scrub walls, floors, trim, and fixtures with approved cleaning agents, then apply a disinfectant that matches the material and the contamination level.
Wear gloves, eye protection, and a respirator if needed, and keep the area ventilated.
If porous materials stayed wet too long, discard them rather than trying to salvage them.
For hard surfaces, rinse thoroughly and dry them fast to limit staining and odor.
Check hidden spaces behind baseboards and cabinets, because moisture can linger there.
Finish with surface protection, such as sealants or antimicrobial coatings, when the surface can safely accept them.
Your crew can keep the space safe and ready for rebuild.
Dry Walls, Floors, and Pipe Cavities
Once you’ve removed standing water, dry the walls, floors, and pipe cavities as quickly as possible to prevent mold, warping, and hidden structural damage.
Use fans, dehumidifiers, and targeted drying techniques to move air through trapped spaces. Pull baseboards if needed so moisture can escape from wall edges and subfloors.
Drill small access points only when you can do it safely, and aim airflow into the cavity. Check for hidden dampness with moisture measurement before you close anything up.
Keep the room warm, but don’t overheat materials. Replace soaked insulation if it won’t dry fully.
You’re not doing this alone; follow the same process your cleanup crew would use to protect the structure and keep the area stable.
Disinfect the Pipe Area After Cleanup
After cleanup, disinfect the pipe area with an appropriate sanitizer and wipe down all nearby surfaces to reduce contamination risk.
You should also inspect hidden spaces behind walls, under flooring, and inside cavities for any remaining moisture.
If you find damp spots, dry them completely before you close the area back up.
Sanitize Surrounding Surfaces
Even when the visible water is gone, you still need to disinfect the pipe area and any nearby surfaces that were exposed to moisture.
Start with a clean cloth and a detergent solution to remove residue, then apply an EPA-registered disinfectant to the pipe exterior, wall, baseboard, and floor edges.
Keep the surface wet for the full contact time on the label; that’s essential for effective mold prevention.
Use gloves, ventilate the area, and replace cloths often so you don’t spread contamination.
If you’re treating painted or sealed materials, test a small spot first to confirm the surface treatment won’t discolor or degrade it.
Wipe away excess, let everything dry, and repeat if you still see grime.
You’ve got this.
Check Hidden Moisture
Check for hidden moisture behind the pipe, under insulation, and inside nearby wall cavities, since surface drying doesn’t always mean the area is dry.
Use a moisture meter, infrared camera, or probe to confirm dry materials before you close anything up. Pay close attention to seams, joints, and baseplates, because hidden leaks often stay active after cleanup.
If readings stay elevated, remove more material and increase airflow with fans and dehumidifiers. You should also inspect adjacent rooms, since water can travel and collect out of sight.
When you find trapped dampness, dry and disinfect the pipe area again so mold can’t establish.
Your crew’s careful moisture detection keeps the job safe, thorough, and ready for the next repair phase.
Repair or Replace the Broken Pipe
Once you’ve exposed the damaged section, decide whether a repair or full replacement makes sense based on the pipe’s material, the size of the break, and the extent of corrosion or cracking.
You can patch small splits in sound pipe with couplings, epoxy, or solvent welds, but only if the surrounding wall is solid. If the damage is wide, jagged, or repeated, replace the section so you’re not chasing leaks later.
Match new pipe materials to the existing line, and use the correct installation techniques, so the joint holds under pressure and flow. Cut cleanly, deburr the ends, and test-fit before you seal anything.
If the pipe feels brittle, warped, or heavily rusted, replacement usually saves you time and keeps your system working as a team.
Prevent Future Storm Water Pipe Damage
After you repair or replace the damaged section, protect the rest of the storm water line so the same failure doesn’t happen again. You can do that with disciplined pipe maintenance and smarter drainage solutions that fit your site.
Inspect joints after heavy rain, clear debris before it hardens, and keep roots away from vulnerable sections.
- Schedule annual camera checks to catch cracks, offsets, and blockages early.
- Improve grading and downspout routing so runoff doesn’t overload the pipe.
- Install cleanouts, filters, or backflow controls where flow spikes are common.
When you track wear and fix minor issues fast, you keep the system reliable and the whole team better prepared.
That kind of care protects your investment and supports a community that counts on dry, safe property after every storm.
Frequently Asked Questions
How Do I Know if My Insurance Covers Pipe Damage Cleanup?
Check your insurance policy for water-damage coverage and exclusions, then call your insurer for a damage assessment. You’ll belong in the process if you document photos, receipts, and timelines before filing your claim.
Can I Safely Turn Water Back on Before a Plumber Arrives?
No, you shouldn’t turn it back on yet. You could worsen the leak, damage fixtures, and compromise safety. Keep the valve shut, check water pressure later, and follow safety precautions until the plumber inspects everything.
What Permits Are Needed for Pipe Replacement After Storm Damage?
You’ll usually need storm damage permits and must follow pipe replacement regulations; about 1 in 4 post-storm repairs need inspection. You should check with your local building department, then pull plumbing and emergency repair permits fast.
How Long Should I Keep Receipts for Cleanup-Related Expenses?
Keep cleanup receipts for at least seven years. You’ll need strong receipt organization and expense tracking for insurance, taxes, or disputes. Store digital copies and originals together, labeled by date, vendor, and category.
When Is Professional Mold Testing Necessary After Pipe Damage?
When pipes burst, you should get professional mold testing if water sat over 24–48 hours, you smell musty odors, see visible mold growth, or anyone has health risks; that old clock still warns you.
Summary
When pipe damage hits, you need to act fast and stay methodical. You shut off the water, inspect the damage, remove standing water, and dry every hidden space. Then you disinfect, repair or replace the pipe, and put safeguards in place against the next storm. Like Odysseus steering through rough waters, you can keep the system on course if you follow each step with care, precision, and speed.
Recent Posts
How to Clean Up Pipe Damage Fast
When a pipe breaks, you need to act fast to limit structural damage and mold
Why Hire Pipe Damage Cleanup Experts?
You need fast cleanup, careful cleanup, and expert cleanup when pipe damage hits your home.
What Pipe Cleanup Experts Do Nearby
When a sewer line backs up in your basement after a heavy rain, nearby pipe