
Contents
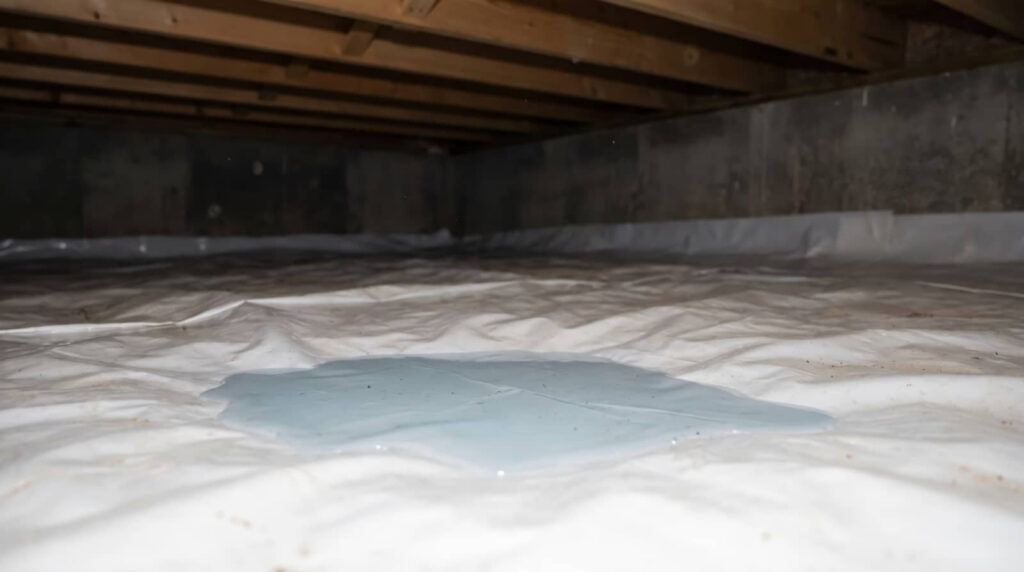
If you’ve spotted standing water in your crawl space, you need to identify the source before it spreads damage through the structure. You’ll want to check drainage, grading, plumbing leaks, and signs of mold or wood decay. Some problems are minor and fixable; others point to a larger failure below the home. The key is knowing what to inspect first, because the next step depends on what you find.
Key Takeaways
- Inspect the crawl space for visible standing water, stains, mold, and musty odors to assess moisture extent.
- Check drainage, grading, gutters, and downspouts for problems directing runoff toward the foundation.
- Look for plumbing leaks, sewer odors, and gurgling drains that may be adding water to the crawl space.
- Remove standing water with a sump pump, then dry debris and inspect the vapor barrier for damage.
- Seal foundation openings and maintain drainage systems to prevent future water intrusion and moisture buildup.
What Causes Crawl Space Standing Water?
Crawl space standing water usually starts with one or more predictable moisture sources: poor surface drainage that sends runoff toward the foundation, clogged or undersized gutters and downspouts, high groundwater that rises after heavy rain, or plumbing leaks inside the structure.
You can also get water intrusion when grading slopes toward the house, foundation cracks open pathways, or exterior drains discharge too close to the wall.
Once moisture enters, the enclosed space traps it, and humidity control becomes harder. If the soil stays wet, water can pool beneath you even when no visible leak exists.
Vapor barriers help limit ground moisture, but they won’t stop active flooding or drainage failures. You’ll get the best results when you correct the source first, then manage vapor and airflow with a practical, coordinated system.
Signs of Crawl Space Water Damage
You can often spot crawl space water damage by checking for visible water stains on joists, insulation, vapor barriers, and foundation walls.
You should also inspect for mold growth and musty odors, since both usually indicate persistent moisture exposure.
If you detect either sign, treat it as a condition that needs immediate moisture-source evaluation and correction.
Visible Water Stains
Brownish tide lines on foundation walls often reveal where crawl space moisture has risen, dried, and returned over time. You can use these marks for water stain identification and moisture source detection by noting height, color, and spread.
Fresh stains usually appear darker, while older lines fade and leave mineral crusts. Check joists, sill plates, piers, and insulation edges for uneven bands or drip patterns.
Compare both sides of the space so you can trace whether runoff, seepage, or plumbing leaks started the damage. Mark each stain location, then inspect grading, vents, drains, and pipe joints above it.
When you document stains carefully, you join other homeowners who catch hidden problems early and protect the structure before damage worsens.
Mold And Musty Odors
If moisture lingers in a crawl space, mold growth and a persistent musty odor often follow quickly. You may notice musty smells near floor registers, baseboards, or access doors, especially after rain or humid weather.
Check joists, insulation, and subflooring for fuzzy patches, dark spotting, or damp surfaces, because these signs usually mean active microbial growth. Treat the odor as a diagnostic signal, not a nuisance; it tells you moisture control has failed.
For mold prevention, improve drainage, seal entry points, and maintain lower humidity with ventilation or dehumidification.
Wear proper protection when inspecting, and document affected areas so you can compare changes over time. When you catch mold early, you protect your home’s structure and your household’s air quality.
Check Drainage and Grading Problems
Check drainage and grading around the foundation first, since poor surface runoff often sends water toward the crawl space instead of away from it.
Walk the perimeter after rain and note low spots, soil settling, and downspout discharge points. You’ll want drainage solutions that move water at least several feet from the wall, not back toward the footing.
Use a level to verify grading techniques: the soil should slope away from the house, typically about 6 inches over 10 feet.
Rebuild eroded areas with compacted fill, clear clogged swales, and extend splash blocks or downspouts where needed.
When you correct runoff paths, you protect the crawl space and join the group of homeowners who keep moisture under control before it becomes a costly problem.
Look for Plumbing Leaks and Sewer Backflow
Once runoff around the foundation is under control, inspect the crawl space for plumbing leaks and sewer backflow, since either one can add moisture fast and create strong odors.
Use a flashlight and trace supply lines, drain joints, and trap connections for drips, corrosion, or loose fittings. During pipe inspection, note damp insulation, mineral staining, or active seepage at valves and elbows.
If you detect gurgling, sewer odor, or slow fixtures, check for backflow from a failed cleanout, main line restriction, or missing backflow prevention device. Shut off water briefly if needed to isolate the source.
Document each location, then call a licensed plumber for repair before you reenter the space. When you act quickly, you protect the whole team and keep conditions controlled.
Check Moisture, Mold, and Structural Damage
With leaks and backflow addressed, inspect the crawl space for lingering moisture, visible mold, and signs of structural damage.
You should check joists, beams, subfloor, and sill plates for staining, swelling, rot, or sagging. Use moisture testing on wood and soil to confirm whether dampness remains above safe levels.
If you spot discoloration, fuzzy growth, or a musty odor, treat it as a likely mold indicator and document the area. Test suspect members with a screwdriver; soft wood can signal decay.
Verify that vents, insulation, and vapor barriers haven’t trapped water against framing. Protect structural integrity by marking damaged zones, photographing them, and tracking any change after drying.
When you move through the space, stay methodical so you and your home team can spot issues early.
When Does Crawl Space Standing Water Need Help?
Standing water in a crawl space needs professional help when it doesn’t drain quickly, keeps returning after drying efforts, or has spread to insulation, framing, or HVAC components.
You’re likely facing a system issue, not a one-time spill, and your space deserves fast, expert attention.
Watch for:
- Water depth over 1/4 inch
- Persistent damp soil or vapor
- Musty odors or visible staining
- Rust, sagging, or soft wood
If these signs show up, schedule water removal and moisture control before damage advances.
You’ll protect shared home systems, reduce repair costs, and keep your crawl space stable. Acting early helps you stay ahead of hidden decay and stay confident your home’s foundation is in good shape.
How Crawl Space Water Removal Works
Crawl space water removal starts with locating the moisture source, then pumping out pooled water and extracting residual dampness from the soil, insulation, and framing.
You’ll usually see a sump pump handle the standing water first, moving it out of the crawl space before it can keep soaking materials.
Next, you remove wet debris, then use air movement and dehumidification to draw moisture from hidden pockets.
If the ground stays exposed, you can verify whether a vapor barrier is already in place or needs attention after cleanup.
You’re not just drying a space; you’re restoring the structural area your home relies on.
When you work methodically, you help protect your crawl space team and keep the assessment accurate for everyone involved.
How to Prevent Crawl Space Water Damage
You can prevent crawl space water damage by installing proper drainage that moves runoff away from the foundation and reduces hydrostatic pressure around the crawl space.
You should seal foundation openings, including cracks, gaps, and utility penetrations, to block bulk water and moisture intrusion.
These controls work together to keep water out before it reaches framing, insulation, and subfloor materials.
Install Proper Drainage
A well-designed drainage system redirects water away from the crawl space before it can pool, seep through foundation walls, or raise humidity levels.
You’ll protect your home better when you combine drainage systems with reliable sump pumps and keep water moving out fast. Focus on these steps:
- Grade soil so surface runoff flows away from the foundation.
- Install perimeter drains that collect groundwater before it reaches the crawl space floor.
- Route discharge lines to a safe outlet that won’t recycle water back near the structure.
- Test sump pumps regularly so they activate during heavy rain.
When you set up proper drainage, you join other homeowners who keep crawl spaces dry, stable, and easier to maintain.
That practical approach lowers moisture loads and helps you spot problems early.
Seal Foundation Openings
Once drainage is working, seal any openings that let water, humid air, or pests enter the crawl space. You should inspect vent grilles, pipe penetrations, rim joists, and cracks along the sill plate, then close them with polyurethane caulk, expanding foam, or hydraulic cement as appropriate.
For larger gaps, install rigid covers and weatherstripping so the seal stays tight through seasonal movement. These steps support foundation waterproofing techniques by limiting bulk water entry and reducing vapor transfer.
If your home uses crawl space ventilation, verify that vents aren’t pulling moist outside air in during humid weather; in many cases, controlled sealing improves conditions.
Work methodically, test for light leaks, and repeat checks after heavy rain so your crawl space stays dry and your home crew stays protected.
Frequently Asked Questions
How Often Should a Crawl Space Be Inspected?
You should inspect your crawl space at least twice yearly, and after heavy rain. That inspection frequency supports crawl space maintenance, helping you catch moisture, pests, and structural issues early, before they affect your home and community.
Can Standing Water Affect Indoor Air Quality?
Yes, standing water can affect indoor air quality by raising humidity levels and promoting mold growth. You’ll notice musty odors, and you should address leaks quickly to keep your home healthier and drier.
Does Homeowners Insurance Cover Crawl Space Water Damage?
Usually, your homeowners insurance covers sudden water damage, but not long-term seepage or neglect. You should review your policy, document the crawl space, and file insurance claims promptly to improve your chances of reimbursement.
How Long Does Crawl Space Drying Usually Take?
Usually, you’ll need 2 to 5 days for crawl space drying, depending on moisture levels, airflow, and drying equipment. You’ll want to monitor crawl space humidity closely until materials read safe and stable.
Are Sump Pumps Always Necessary in Crawl Spaces?
No, you don’t always need a sump pump in crawl spaces; you assess drainage first. You’ll choose among sump pump types only when water persists. Good crawl space maintenance helps you protect your home and belong confidently.
Summary
You can stop crawl space standing water by fixing drainage, correcting grading, and sealing plumbing leaks before moisture spreads. Many homes with crawl spaces show some moisture-related damage, which shows how quickly small water problems become structural risks. If you monitor humidity, inspect for mold, and use a sump pump or vapor barrier when needed, you’ll protect your home’s framing, insulation, and indoor air quality.
Recent Posts
3 Tips for Sewage Backup Water Damage Repair
When sewage backs up, you need to stop the flow fast, shut off the affected
Emergency Sewage Cleanup: How-To Guide
Sewage cleanup is both a routine task and a biohazard emergency. You need to stop
What Is Emergency Sewage Backup Cleanup?
If you’re dealing with an emergency sewage backup, you’re facing more than a mess—you’re confronting