Contents
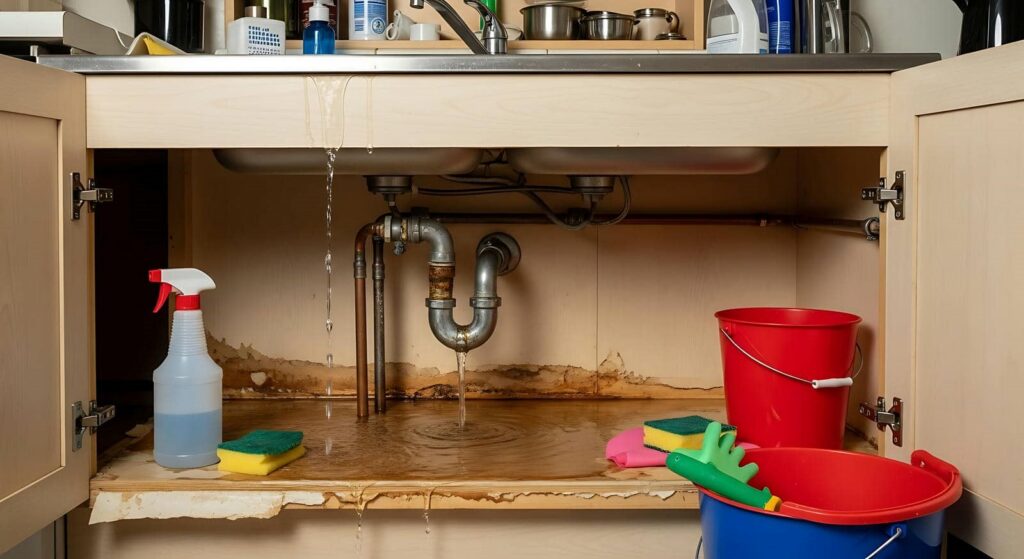
A broken pipe cleanup can turn a dry room into a wet hazard in minutes. You should shut off the main water supply first, then check for warped floors, stained drywall, and hidden moisture. Remove standing water, document damage, and start drying with air movers and dehumidifiers. Sanitize surfaces to slow mold growth, but if water has reached walls or insulation, you may need expert cleanup before the damage spreads.
Key Takeaways
- Shut off the main water supply and nearby power immediately to stop leaks and reduce electrical hazards.
- Inspect and document visible water damage, including stains, warped materials, cracks, and musty odors.
- Remove standing water and debris quickly using towels, a wet/dry vacuum, and sealed bags.
- Dry affected areas thoroughly with dehumidifiers, air movers, and exposed hidden spaces to prevent mold.
- Disinfect all wet surfaces and consider professional restoration for extensive damage or concealed moisture.
Check the Damage From the Broken Pipe
Start by inspecting the area around the broken pipe so you can see exactly what failed and how far the water spread. During this pipe inspection, look for cracks, loose joints, corrosion, and any warped materials nearby.
Check walls, baseboards, flooring, and nearby fixtures for staining, swelling, or soft spots. Your damage assessment should note what’s wet, what’s soaked through, and what may need replacement.
Use a flashlight and take photos so you can track conditions clearly. If you’re part of a cleanup crew, share your notes so everyone stays aligned.
Focus on the full path of water travel, not just the visible leak. Quick, accurate inspection helps you make smart cleanup decisions and protect the space.
Shut Off Water and Protect the Area
Once you’ve mapped the damage, shut off the main water supply to stop the leak from getting worse. If you can’t find the valve, follow the line to the meter or call your utility team for help.
After water shutoff, kill power to nearby outlets and appliances if moisture’s present. Then set up area protection by blocking foot traffic with tape, cones, or furniture moved aside.
Lay down plastic or waterproof covers over furniture, boxes, and clean surfaces that could get splashed or stained. Keep pets and kids out of the zone so your crew stays safe and focused.
Label wet spots and exposed hazards clearly, then keep tools and supplies within reach. This steady setup helps your household work together and makes the next cleanup steps smoother.
Remove Standing Water and Debris
Begin removing standing water as soon as the area is safe, using a wet/dry vacuum, pump, or absorbent towels for shallow puddles.
Keep your water extraction moving in sections so you can track progress and avoid spreading contamination.
Lift rugs, small furniture, and loose items only if they’re light enough to move safely.
Then start debris removal: pick up broken plaster, insulation, food, paper, and other solids with gloves and a sturdy container.
Sort sharp or contaminated materials into sealed bags.
Don’t push sludge into drains or corners.
Stay organized, work from the outside in, and keep a clear path for cleanup.
If water keeps returning, pause and check for the source.
You’re not alone in this step; careful removal now helps your crew finish the job faster.
Dry Walls, Floors, and Hidden Spaces
You need to dry wall cavities, floors, and other hidden spaces quickly after a broken pipe to limit moisture retention.
Use air movers, dehumidifiers, and targeted ventilation to pull moisture from trapped areas and reduce the risk of mold and structural damage.
Check concealed spaces with a moisture meter so you can confirm they’re fully dry before you close them up.
Drying Wall Cavities
After a pipe break, dry the wall cavities, floor voids, and other hidden spaces as quickly as possible to limit mold growth and structural damage.
You should open affected cavities, remove wet wall insulation, and inspect moisture barriers for trapped water. Use air movers and dehumidifiers to pull humidity from enclosed spaces, and keep pathways clear so airflow reaches every bay.
Check framing, drywall edges, and fasteners for dampness with a meter, then continue drying until readings stabilize. If you find softened material, you’ll need to remove it before closing the wall.
Work methodically, document each step, and coordinate with your restoration team so everyone stays aligned.
Fast, targeted drying helps your space recover cleanly and keeps your home safer for the people who belong there.
Floor and Hidden Moisture
Wet floors and hidden moisture can keep damaging the structure long after the visible water is gone, so check under flooring, inside baseboards, behind cabinets, and in wall-to-floor junctions right away.
You should use moisture detection tools to confirm dry conditions in the subfloor, trim, and framing. If readings stay elevated, remove affected flooring materials so air can reach trapped areas.
Lift carpet, inspect padding, and test hardwood, laminate, or vinyl for swelling, cupping, or delamination. Keep dehumidifiers and fans running until each layer reaches safe levels.
You’re not fixing this alone; a careful, shared response helps protect the whole space. Seal dried areas only after you’ve verified there’s no hidden dampness left to restart decay, odor, or mold growth.
Disinfect and Prevent Mold Growth
You should sanitize all affected surfaces with an appropriate disinfectant after the area dries.
Check hidden spaces for trapped moisture and dry them completely to stop mold from forming.
Then keep humidity low, improve airflow, and replace any materials that stay damp.
Sanitizing Affected Surfaces
Once you’ve stopped the leak and removed standing water, clean all affected surfaces with soap and water, then apply a disinfectant that’s appropriate for the material and the type of contamination.
Use proven sanitization techniques and match the product to your surface materials so you don’t damage finishes or leave residue. Wipe countertops, baseboards, and fixtures in small sections, keeping the room organized and safe for everyone helping out.
- A bright sink area with cleaned tile and chrome.
- A damp cloth passing over painted trim.
- A labeled disinfectant bottle beside sealed flooring.
Let the disinfectant stay wet for the full contact time on the label, then remove any excess.
If you work methodically, you’ll protect your space and support a healthier home together.
Drying Hidden Moisture
Even after visible water is gone, moisture can stay trapped in subfloors, wall cavities, insulation, and under cabinets.
So dry these hidden areas as quickly as possible to reduce the risk of mold and lingering contamination. You should open access points, pull baseboards if needed, and use targeted drying techniques that move air into tight spaces.
Set dehumidifiers nearby to lower indoor humidity and speed evaporation. Check progress with moisture meters, not guesswork, because hidden dampness can persist after surfaces feel dry.
Keep the area contained and monitored, and repeat readings until levels return to normal. When you work methodically, you protect your space, your people, and the repairs you’ve already made.
Mold Prevention Steps
After the area is dry, clean all affected surfaces with an EPA-registered disinfectant to remove residues and reduce the chance of mold growth. You’ll protect your space and keep your home feeling safe for everyone inside.
Scrub seams, baseboards, and nearby trim where moisture lingered. Use these prevention techniques:
- Picture a bright bucket, gloves, and a microfiber cloth moving across clean drywall.
- See a dehumidifier pulling damp air from a closed room.
- Notice a flashlight checking corners for mold types like dark spots or fuzzy film.
Keep ventilation steady, replace porous materials that stayed wet, and monitor humidity below 60%.
If you smell musty odors or spot new growth, act fast. Quick cleanup helps your team prevent spread, reduce repair costs, and restore comfort.
Know When to Call Cleanup Experts
If the pipe burst in a small, contained area, you may handle the initial water shutoff and surface drying yourself; however, you should call cleanup experts when water has spread into walls, ceilings, insulation, or flooring, when sewage or contaminated water is involved, or when you can’t fully dry the area within 24 to 48 hours.
Their emergency response helps limit structural damage, hidden moisture, and secondary mold growth. They use moisture meters, air movers, and dehumidifiers to verify drying, not guess. You’ll also get documentation that supports insurance claims and reduces disputes.
If the damage smells musty, affects electrical systems, or keeps reappearing, don’t wait. You belong with a team that handles restoration safely, quickly, and with the right equipment.
Frequently Asked Questions
How Soon Should Insurance Be Notified After a Pipe Breaks?
Notify your insurer immediately, ideally within hours, because immediate reporting helps protect coverage and speeds insurance claims. You’ll fit right in with policy requirements when you document damage, limit loss, and contact them fast.
Can I Keep Using Electrical Outlets Near the Damaged Area?
No, you shouldn’t use those outlets. You risk electrical hazards until a qualified electrician verifies outlet safety. If you need power, use a dry, separate circuit and keep everyone away from the damaged area.
What Items Should Be Saved Versus Discarded After Pipe Damage?
Save hard, nonporous items and quickly dried valuables; discard soaked drywall, insulation, carpets, and warped particleboard. Your restoration priorities are safety, sanitation, and salvageable items with no mold, odor, or structural damage.
How Do I Document Water Damage for an Insurance Claim?
You’ll photograph every affected area, note dates, times, and sources, and save receipts. Capture water damage from multiple angles, then organize files for the claim process. You’ll feel confident, connected, and ready.
What Plumbing Inspections Prevent Future Pipe Bursts?
You can prevent bursts with routine inspections of pipes, valves, joints, and water pressure. Include preventive maintenance like corrosion checks, insulation, and leak testing. You’ll spot weak points early, protect your home, and stay prepared.
Review
When a pipe breaks, act fast—an ounce of prevention is worth a pound of cure. You should inspect the damage, shut off the water, and remove standing water right away. Then dry walls, floors, and hidden spaces with air movers and dehumidifiers. Disinfect all affected surfaces to help stop mold. If the damage is extensive or unsafe, call cleanup experts to restore your space correctly and protect your health.
Recent Posts
10 Best Ways to Remove Pipe Backup
If your basement drain backs up after a heavy rain, you need Remove Pipe Backup services to act fast
7 Sewage Cleanup Experts for Pipe Repairs
When your basement starts smelling like sewage after a pipe bursts, you need help fast.
How to Handle Broken Pipe Cleanup
When a supply line bursts behind your kitchen wall, you need Sewage Cleanup Experts for Pipe Repairs to shut