
Contents
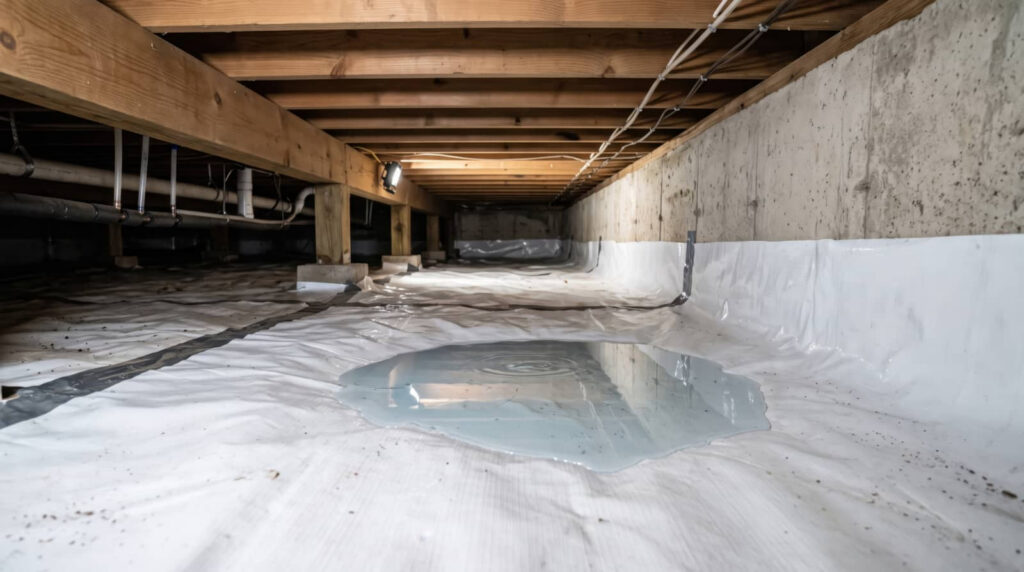
If you notice standing water in your crawl space, you need to identify where it’s coming from before you remove it. Check grading, foundation cracks, plumbing lines, and moisture barriers, then measure the depth in several spots to gauge the scope. You’ll also want to inspect for mold, rot, rust, and insulation damage. What you find next will tell you whether the problem is minor or already affecting the structure.
Key Takeaways
- Trace the water source by checking grading, gutters, downspouts, cracks, vents, seals, plumbing, and groundwater pressure.
- Measure water depth in multiple crawl space areas to judge severity and compare changes over time.
- Remove standing water quickly with pumps or wet vacs, then dry the area using fans and dehumidifiers.
- Inspect for mold, rot, rust, damp insulation, and vapor barrier damage caused by excess moisture.
- Check foundation walls, soil, and piers for cracks, settling, or displacement, and document all findings with photos.
Find the Source of Crawl Space Water
Start by tracing where the water enters the crawl space, because the source usually points to the right fix. Check exterior grading, gutter downspouts, and low spots that send runoff toward the foundation.
Look for cracks, open vents, failed seals, and plumbing leaks that let moisture in. If rainwater shows up after storms, prioritize water drainage solutions like extending downspouts, regrading soil, and sealing entry points.
If water appears without rain, inspect pipes, HVAC condensate, and nearby groundwater pressure. You’re not guessing here; you’re building a clear path to the cause so your crew can act fast.
When the source stays persistent, compare sump pump options that match the site’s flow, power needs, and backup requirements.
Check Crawl Space Water Depth
Measure the water depth right away so you can judge the severity of the problem and choose the correct response. Use a ruler, marked dowel, or tape measure, and note the deepest point.
Shallow water may point to a drainage issue; deeper pooling needs faster action. Keep your reading consistent by checking several spots, especially low areas and corners. This helps you plan crawl space maintenance with confidence.
- A thin sheen across the soil
- Water halfway up a boot sole
- A clear puddle around supports
- A deep pocket near an edge
Record the inches, compare them over time, and share the data with your repair team. Accurate depth checks improve water drainage decisions and help you stay ahead together.
Look for Mold, Rot, and Rust
You should inspect crawl space surfaces for mold growth, especially dark spots, fuzzy patches, and musty odors on framing, insulation, and sheathing.
Check wood for rot by probing soft, swollen, or crumbling areas, since these signs point to ongoing moisture damage.
Look for rust on metal fasteners, ducts, and supports, because corrosion confirms prolonged exposure to water or humidity.
Mold Growth Signs
When crawl space moisture lingers, mold often appears first on wood framing, insulation, or ductwork as dark, fuzzy, or powdery patches. You should inspect every surface with a flashlight and note any musty smell.
In a healthy crawl space, you’ll spot these warning signs early and act fast. Use mold prevention strategies like improving airflow and controlling humidity, then compare findings before using mold removal methods.
- Green-black specks on joists
- White film on insulation batts
- Gray dust around vents
- Rust stains beside damp metal
If you see spread along edges or seams, treat it as active growth. Document the location, size, and color, then plan cleanup so your space stays safer and your crew stays informed.
Wood Rot Clues
Wood rot often shows up after repeated crawl space wetting, especially where lumber stays in contact with damp soil, standing water, or persistent condensation.
You can spot early wood deterioration by checking joists, beams, and sill plates for dark staining, soft fibers, and a crumbly surface.
Probe suspicious areas with a screwdriver; if it sinks in easily, decay has started.
Look for fungal growth, musty odors, and edges that flake when touched.
Compare wet and dry zones so you can trace the source.
When you see these clues, document them and plan moisture prevention right away.
Our community knows these signs matter because catching rot early helps you protect structure, reduce repair costs, and keep the crawl space safer for everyone.
Rust Damage Indicators
Rust streaks often signal ongoing moisture exposure in a crawl space, especially around metal hangers, fasteners, ducts, and support posts.
You should inspect every joint and seam for orange dust, pitting, or flaking metal. Check nearby wood for mold, soft rot, or dark stains, because rust often travels with damp air.
- A corroded pipe with rough, scaly edges
- Fasteners haloed by orange-brown stains
- Ductwork with blistered coating and rust trails
- Support posts showing damp rings at the base
If you spot these clues, improve drainage, ventilation, and vapor control right away.
Use rust prevention methods and corrosion control techniques to slow damage and protect the structure you’re caring for.
Inspect Crawl Space Vapor Barrier and Insulation
Check the crawl space vapor barrier for tears, gaps, or displaced seams that can let ground moisture enter.
Inspect the insulation for damp spots, compressed fibers, or a musty odor, since those signs often point to water exposure.
Look for mold growth and sagging sections, because wet insulation loses performance and can indicate ongoing leaks or condensation.
Vapor Barrier Damage
When you inspect crawl space water, start by examining the vapor barrier and insulation for tears, loose seams, sagging sections, and moisture staining. You’re checking vapor barrier integrity, so look for gaps where moisture barrier materials no longer overlap or seal. Even small damage can let ground vapor rise and spread through the crawl space.
- Split seams along the soil line
- Wrinkled plastic pulled from piers
- Pooled water under loose edges
- Dark staining around penetrations
If you see these signs, mark the area and plan repairs fast. A sound barrier helps your crew protect the crawl space together, reduce damp air entry, and keep conditions stable.
Don’t ignore exposed soil; it can signal a failed barrier and a larger moisture control issue.
Insulation Moisture Signs
After you’ve reviewed the vapor barrier, inspect the insulation for moisture signs that point to crawl space water problems.
Check fiberglass batts, foam board, and other insulation types for darkening, dripping, or a cool, damp feel. If the insulation hangs loose, compresses, or clings to framing, water may be reaching it through failed moisture barriers.
Run your hand along exposed edges and seams; saturated spots often feel heavier than surrounding material. Look for mineral staining on nearby wood and for rust on fasteners that confirm repeated dampness.
You’re not just spotting damage—you’re verifying where crawl space water is entering and how far it’s spreading. Document each affected area so you and your contractor can target repairs, improve drying, and protect the crawl space from recurring moisture.
Mold And Sagging
Mold and sagging are two clear warning signs that your crawl space vapor barrier or insulation has already failed. You need to inspect seams, fasteners, and joists for damp spots, dark growth, and material pulling away. When you catch these issues early, you protect your home and stay ahead of costly repairs.
- Look for white, green, or black patches on barrier edges.
- Check insulation for drooping batts or wet fiberglass.
- Notice musty odors rising from the crawl space.
- Feel for soft, warped, or detached floor insulation.
If you see these signs, act fast with mold prevention steps and sagging solutions, such as sealing tears, replacing saturated insulation, and improving drainage.
You’re not alone; smart crawl space care keeps your space drier, healthier, and stronger.
Check for Foundation or Soil Damage
Look for cracks, bowing, or settling in the foundation walls, and check whether water has washed out or softened the soil around footings and piers.
During this foundation inspection, note horizontal cracks, uneven mortar joints, and gaps where framing no longer sits tight.
Probe the soil with a screwdriver; if it sinks easily, your soil integrity may be compromised.
Watch for eroded trenches, exposed footings, or piers that lean, since these signs can shift loads and worsen movement.
If you spot fresh displacement, mark it and compare it after drying.
You’re not alone in this process; many crawl space owners catch problems early with a careful, methodical look.
Address drainage and structural issues fast so your space stays stable, dry, and safe.
Test for Sewage or Other Contaminants
Test the water for sewage, petroleum, and other contaminants before you handle any debris or insulation. You’ll reduce contamination risks and protect your crew with prompt sewage testing.
Wear gloves, boots, eye protection, and a respirator if odors are strong. Collect a sample in a clean container, label it, and keep it cool for lab analysis. If you see a sheen, dark sludge, or a foul smell, treat the crawl space as unsafe.
- Murky water pooling around joists
- Oily rainbow film on the surface
- Stained insulation hanging below pipes
- Rusted tools and damp soil nearby
Use disinfectant only after results confirm what’s present. If testing shows sewage, isolate the area and follow local disposal rules. Acting early helps your team stay informed, calm, and safe together.
Document Crawl Space Damage for Insurance
Take photos and video before you move anything, and capture wide shots plus close-ups of standing water, soaked insulation, damaged joists, stained soil, and any fallen debris.
Then note the date, time, weather, and where you found each issue. Keep a simple log that matches each image to a location in the crawl space.
Save receipts for pumps, fans, tarps, and inspections, since they support insurance claims. If you can, measure water depth with a ruler and record any visible structural damage.
Share copies with your adjuster and keep backups in the cloud and on paper. A clear documentation process helps you prove the loss, speed review, and protect your claim.
You’re not handling this alone; careful records make the next steps easier for your crew.
Check Crawl Space Humidity Levels
You should keep crawl space humidity between 30% and 60% to reduce the risk of mold and structural damage.
Use a hygrometer to check the relative humidity at multiple points, especially near walls and standing water.
If you see condensation, musty odors, or damp insulation, you’re likely dealing with excess moisture.
Ideal Humidity Range
What humidity level is safe in a crawl space? You want 30% to 50% relative humidity; above 60%, the risk of mold and wood decay climbs fast.
Keep your crawl space in that range with steady humidity control, sealed vents, and the right dehumidifier options for your square footage and soil conditions. When you stay consistent, you protect framing, insulation, and stored items, and you join the group of homeowners who catch moisture issues early.
- Dry joists, not damp
- Air that feels balanced
- No musty odor
- No visible condensation
If readings drift upward, act quickly. Your goal is a stable, breathable space, not a wet one. That target helps you prevent damage, reduce pests, and keep the area healthier year-round.
Use a Hygrometer
A hygrometer gives you a direct reading of crawl space humidity, so you can spot problems before moisture turns into mold or wood rot.
Place it near the center of the crawl space, away from vents and damp soil, then let it stabilize before you record results. Check humidity readings at different times of day to catch fluctuations that matter to your home team.
If the numbers seem off, verify hygrometer calibration against a known standard or replace the unit. You want consistent data, not guesses, because precise readings help you decide when to improve drainage, ventilation, or sealing.
When you monitor regularly, you stay ahead of moisture and protect the space you share with your home.
Signs Of Excess Moisture
If crawl space humidity stays above 60%, moisture is likely building to damaging levels. You can verify this with a hygrometer and track trends for moisture detection.
Look for these signs:
- Dull, musty air that greets you at the hatch
- Beads of water on joists, ducts, or vapor barriers
- Darkened wood, rust on fasteners, or white mineral stains
- Damp insulation hanging heavy and losing shape
When you spot two or more, your crawl space needs humidity control, not guesswork.
Seal obvious air leaks, improve drainage, and run a dehumidifier if readings stay high. Check corners, rim joists, and around pipes because moisture gathers there first.
Staying alert helps you protect your home and stay in step with other homeowners who manage crawl space problems early.
Decide Whether to Pump or Dry Out
Start by judging the water’s depth and source: standing water more than a few inches deep, or water that’s still entering the crawl space, usually needs pumping before drying can begin.
If the water is shallow and no longer rising, you can often move straight to drying methods.
Choose pump options that match the volume, such as a utility pump for larger puddles or a wet vac for small areas.
After removal, increase airflow with fans and a dehumidifier, and expose damp materials so they dry evenly.
Check joists, insulation, and soil for lingering moisture.
You’re not just clearing water; you’re restoring a dry, stable crawl space that helps protect your home and keeps your crew of homeowners confident.
When to Call a Crawl Space Water Damage Pro
Call a crawl space water damage pro when the water keeps returning, covers a large area, or has already soaked insulation, joists, or subflooring.
You’ll also need help if you smell musty odors, see sagging materials, or suspect mold growth. Pros use crawl space inspections to pinpoint leaks, drainage failures, and hidden structural damage before it spreads.
- Damp fiberglass hanging like wet moss
- Wood framing darkened and swollen
- Standing water reflecting a dim light
- Rusted vents and fasteners
A trained technician can dry the space, repair entry points, and support water damage prevention with grading, vapor barriers, and drainage fixes.
If you’re unsure, don’t wait; repeated moisture can weaken your home and raise costs fast.
Frequently Asked Questions
How Often Should Crawl Space Standing Water Be Inspected?
You should inspect crawl space standing water monthly, and after heavy rain, because crawl space maintenance and water drainage problems can worsen fast. Regular checks help you protect your home and stay confidently ahead.
What Tools Help Measure Crawl Space Water Safely?
You can use a moisture meter, laser water level, and extendable inspection pole—why risk guesswork? You’ll measure standing water safely, check moisture spots, and stay connected to a crew that values solid, practical decisions.
Can Standing Water Damage HVAC Components in the Crawl Space?
Yes, standing water can damage your HVAC components in the crawl space. You’ll face HVAC corrosion, electrical faults, and mold risk unless you improve Water drainage, seal leaks, and inspect equipment regularly.
Does Crawl Space Flooding Affect Indoor Air Quality?
Yes, crawl space flooding can harm your indoor air quality by increasing humidity levels and promoting mold growth. You’ll breathe more damp, contaminated air unless you dry it quickly, seal leaks, and monitor ventilation.
What Pests Are Attracted to Crawl Space Standing Water?
Standing water attracts mosquitoes, cockroaches, termites, and rodents, creating mosquito breeding and pest infestations. You’ll need to drain it fast, seal entry points, and monitor moisture—like a medieval sentinel guarding your home’s hidden chamber.
Conclusion
Before you assume the water is gone, take one last look. You’ve traced the source, checked the depth, and inspected for mold, rot, rust, and hidden damage. If the humidity stays high or the barrier is failing, the problem may be bigger than it looks. Keep documenting everything, because the next signs you spot could decide whether you dry it out yourself or call in a pro before the damage spreads.
Recent Posts
3 Tips for Sewage Backup Water Damage Repair
When sewage backs up, you need to stop the flow fast, shut off the affected
Emergency Sewage Cleanup: How-To Guide
Sewage cleanup is both a routine task and a biohazard emergency. You need to stop
What Is Emergency Sewage Backup Cleanup?
If you’re dealing with an emergency sewage backup, you’re facing more than a mess—you’re confronting