
Contents
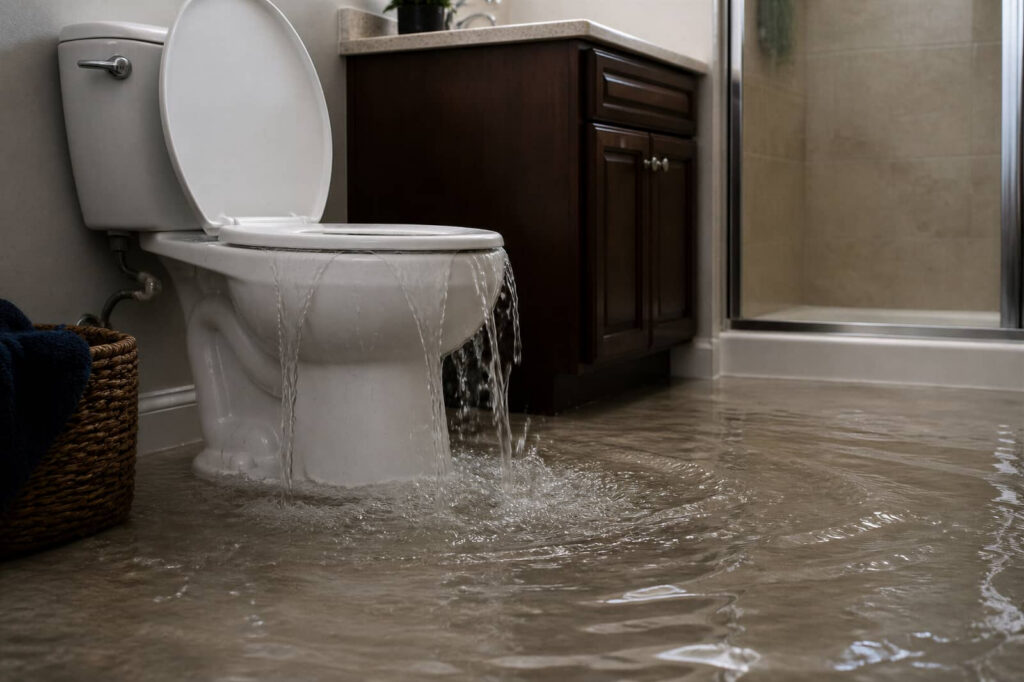
A toilet overflow can send water beyond the visible puddle in minutes. You should shut off the supply, cut power to affected areas if needed, and inspect the floor, baseboards, walls, and trim for moisture intrusion. Check beneath flooring and behind fixtures for hidden damage, then document what you find and start drying immediately. The real question is how far the water traveled before you noticed it.
Key Takeaways
- Shut off the toilet supply valve immediately and stop the overflow at the source.
- Inspect the bowl, tank, floor, baseboards, and walls for visible water damage and spreading moisture.
- Remove standing water, damp rugs, and porous materials, then use fans and dehumidification to dry the area.
- Document wide shots and close-ups of stains, warped materials, seams, and waterlines before cleanup.
- Check subfloors and hidden spaces for saturation; call a professional if water reached walls, crawl spaces, or porous materials.
What to Check First After an Overflow
First, check whether the overflow is still active and shut off the toilet’s water supply at the valve behind the bowl if needed.
Then inspect the bowl, tank, and floor for visible overflow causes, such as a stuck flapper, blocked trap, or excessive fill level.
Look closely at the base seal, nearby grout, and any absorbent materials for saturation, staining, or softening.
You should note how far water traveled, since that tells you which surfaces need priority attention.
If you’re working with others, assign one person to document conditions while another keeps the area contained.
Use these prevention tips: keep the fill valve calibrated, avoid flushing nonflushables, and check the supply line regularly.
Your careful first pass helps your team respond fast and stay coordinated.
Stop the Leak and Shut Off Power
Once you’ve confirmed the overflow, shut off the toilet’s supply valve and stop any active leak at the source; if water is still running, close the angle stop fully and, if necessary, shut off the branch line to prevent continued discharge.
You’re now in emergency response mode, and fast leak detection matters: listen for hissing, inspect the fill valve, and verify the tank isn’t refilling on its own.
If the overflow started from a loose connection, tighten it only after the water is off. Keep everyone clear of the area while you check for energized equipment nearby, and don’t touch wet outlets or cords.
When the flow stops, you’ve limited the damage and can move forward together, using a methodical approach that protects your team and the space.
Check the Floor and Baseboards
Inspect the floor around the toilet for discoloration, warping, soft spots, or lifted seams, since these signs indicate surface damage from standing water.
Check the baseboards for swelling, separation, peeling paint, or a damp edge where moisture’s been absorbed.
If you find any of these conditions, document them immediately so you can assess the extent of water intrusion.
Floor Surface Damage
Check the floor around the toilet for swelling, warping, soft spots, discoloration, or a spongy feel, since standing water can quickly damage subflooring and finish materials.
You should trace the affected area outward in a grid, pressing firmly with your heel and checking for flex, cracks, or lifted seams in tile, vinyl, laminate, or wood floor materials.
If the surface sounds hollow or feels uneven, mark the boundaries and compare them to dry sections nearby. Measure moisture with a meter if you have one, because hidden saturation can persist below the finish layer.
Document what you find, then review repair options based on the material type and the depth of damage. Act quickly, and you’ll protect your space and stay aligned with others who handle the problem methodically.
Baseboard Swelling Signs
If the overflow reached the wall edge, examine the baseboards for swelling, cupping, peeling paint, separation at the joints, or a soft, pressed-in feel, because moisture often travels under the trim before it’s obvious on the surface.
You should compare each section of baseboard materials for uneven expansion, staining, or a hollow sound when tapped lightly.
Focus on corners, seams, and any area where caulk has split, since these are common moisture indicators.
If the board feels damp or flexes under pressure, document the location and measure the affected span.
Check behind loose trim for hidden discoloration on drywall and subfloor edges.
You’re not overreacting by tracing small changes early; you’re protecting the room from deeper structural damage and helping your cleanup team respond with confidence.
Inspect Walls, Cabinets, and Trim
Start by scanning the walls, cabinet fronts, baseboards, and trim around the toilet for discoloration, warping, swelling, peeling paint, or soft spots that indicate water has wicked into the materials.
Check wall materials for lifted seams, bubbled texture, or uneven sheen, and compare both sides of each nearby panel if accessible.
Inspect cabinet finishes for cloudy film, edge swelling, or finish separation at joints and hardware holes.
Run your fingers lightly along painted trim to find rough patches, then press gently to confirm firmness.
Note any staining that extends above the floor line, since it can mark splash or overflow contact.
If you find damage, document it, then keep the area dry so you and your crew can judge whether the moisture is active or stable.
Look for Water Under Floors and Behind Walls
Once you’ve ruled out visible damage on walls, cabinets, and trim, inspect the floor assembly and wall cavities for concealed water intrusion. Remove baseboards if needed, then probe soft spots, warped edges, and lifted flooring for hidden leaks.
Use moisture detection tools to map readings across thresholds, along seams, and near plumbing penetrations. If the meter spikes, mark the area and verify whether the subfloor feels cool, swollen, or springy.
Check behind access panels and inside adjacent closets for staining, rusted fasteners, or damp insulation. You’re not just hunting damage; you’re protecting your space and the people who rely on it.
- Reassured when you confirm dry framing
- Alert to subtle movement underfoot
- Focused on accurate moisture detection
- Supported by a careful, shared process
Check for Sewage Contamination
How do you determine whether the overflow involved sewage rather than clean water? You inspect the toilet bowl, trap, and overflow path for visible solids, brown discoloration, and a strong waste odor.
Check nearby surfaces for residue lines, splatter patterns, and toilet paper fragments. If the water backed up from the bowl, treat it as contaminated until proven otherwise.
Wear gloves and, if needed, a mask while you document the affected materials. Compare the source to supply-line leaks, which usually leave clear water and no odor.
Your goal is sewage safety: identify what touched each surface, then mark porous items for replacement and nonporous items for disinfection. This method supports contamination prevention and helps you make the same careful decision your community would expect.
Dry the Area Before Mold Grows
After you’ve confirmed the contamination source, remove standing water right away and dry the area as fast as possible to limit mold growth.
Use wet vacuums, mops, and absorbent towels, then position fans and a dehumidifier to accelerate airflow and lower humidity. Open nearby windows only if outdoor conditions are dry.
Remove damp rugs, bath mats, and porous items that trap moisture. Focus on mold prevention by checking baseboards, grout lines, and under fixtures for hidden wetness.
These drying techniques help you protect your space and stay part of a home that feels safe and cared for.
- You can stop a bad problem from spreading.
- You’ll avoid that musty smell everyone dreads.
- You’ll help your household feel calmer.
- You’ll reclaim control fast.
Take Photos for Your Insurance Claim
Start by photographing the overall damage from multiple angles so you can show the full extent of the toilet overflow and affected rooms.
Then take close-up shots of stained materials, water lines, damaged flooring, and any visible contamination, making sure each image is sharp and date-stamped if possible.
As you clean and dry the area, keep recording progress photos to document what you’ve removed, what’s been repaired, and how the condition changes over time.
Capture Overall Damage
A thorough photo log gives your insurance claim a clear damage record. You should stand back and capture each affected room, showing the toilet overflow water damage from the water source through the spread pattern.
Use landscape orientation, steady framing, and wide shots that include walls, floors, baseboards, and nearby fixtures so your damage assessment reads like a complete field report. Document the room from each corner, then repeat at doorway height to show depth and extent. Keep every image sharp and well lit.
- You’ll feel more in control when the full scene is visible.
- You’ll reduce confusion if adjusters see the same layout you saw.
- You’ll support your neighbors’ trust by showing honest evidence.
- You’ll preserve the reality of the loss before cleanup starts.
Document Close-Up Details
Once you’ve captured the overall scene, move in for close-ups that isolate each damaged surface, stain edge, and waterline so your insurer can verify the toilet overflow claim in detail.
Photograph baseboards, flooring seams, drywall, cabinetry, and any warped trim with sharp focus and good lighting. Include a ruler, coin, or other scale beside the damage to show size and depth.
Shoot from multiple angles so you can document texture changes, discoloration, and saturation patterns that support the claim. Keep each image centered on one issue, and avoid clutter that hides evidence.
If you notice a recurring leak path, note where drainage solutions may help later. This methodical record also supports future plumbing maintenance discussions with your contractor, and it helps you stay aligned with others facing the same repair process.
Record Cleanup Progress
Capture the cleanup as it unfolds so your insurer can see the full progression of damage reduction and remaining loss. Use clear photos before, during, and after each phase, and label them with dates, rooms, and actions taken.
Your progress tracking should show standing water removal, disinfection, drying equipment placement, and material disposal. Keep shots wide and close so you document both scope and detail.
- You prove you acted fast.
- You show your team you’re organized.
- You reduce disputes over hidden damage.
- You preserve evidence when emotions run high.
Apply the same cleanup techniques each day, and keep the camera angle consistent for comparison.
If you’re part of a supportive household, these records help everyone stay aligned and confident during recovery.
Watch for Subfloor and Crawl Space Damage
Underfoot, the real damage often hides where you can’t see it, so inspect the subfloor and any accessible crawl space for sagging, discoloration, swollen plywood, soft spots, mold growth, and lingering moisture after a toilet overflow.
Use a flashlight and probe to confirm firm decking, then map affected areas with notes and photos during subfloor inspection. Check joists, fasteners, and insulation for stains or dampness, and feel for cool, musty air that signals trapped water.
In crawl space maintenance, keep vents clear and document wet framing, because your crew benefits from the same careful standard you use.
If the surface flexes or the wood crumbles, mark it for drying and follow-up. Stay methodical, and you’ll protect the structure and your household.
When to Call Water Mitigation Help
Call water mitigation help when the overflow reaches more than the bathroom floor, soaks into drywall, baseboards, subflooring, or insulation, or keeps spreading after you shut off the supply and remove standing water.
You need an emergency response when water touches porous materials, enters wall cavities, or leaves a persistent odor. A water restoration team can meter moisture, extract hidden water, and set containment and drying equipment before mold starts.
- You’ll feel relief knowing trained techs are tracking the damage.
- You’ll avoid guessing about unsafe hidden moisture.
- You’ll protect your home’s structure and your household’s routine.
- You’ll join others who act fast and recover cleanly.
Frequently Asked Questions
How Long Does Toilet Overflow Water Damage Take to Show Mold?
Mold can show within 24 to 48 hours after a toilet overflow, especially on porous materials. You should dry surfaces fast, inspect hidden areas, and practice toilet overflow prevention to stay protected together.
Can Toilet Overflow Water Damage Affect Electrical Outlets Nearby?
Yes—one toilet overflow can reach outlets fast. You’re facing electrical hazards if water touches wiring or boxes; moisture can triple shock risk. Cut power, protect water safety, and inspect outlets methodically.
Does Homeowners Insurance Usually Cover Toilet Overflow Cleanup?
Usually, your homeowners insurance covers toilet overflow cleanup if the cause is sudden and accidental, but your insurance policy may exclude backups. You’ll want to review cleanup costs, deductibles, and endorsements carefully.
When Should I Replace Flooring After a Toilet Overflow?
You should replace flooring when water wicks beneath it, warps planks, swells subfloors, or odors persist after drying. Your flooring materials and the restoration timeline determine whether salvage works or replacement protects your home.
Can Toilet Overflow Water Damage Cause Hidden Structural Problems?
Yes, toilet overflow water damage can hide structural problems. You’ll need to inspect subfloors, joists, and fasteners for hidden leaks, rot, and mold, because prolonged moisture can weaken structural integrity and compromise your home.
Final Thoughts
In the end, you should move quickly and methodically after a toilet overflow. Shut off the water, protect the power, and inspect floors, baseboards, walls, cabinets, and hidden spaces for moisture damage. Dry every affected surface thoroughly, document everything for insurance, and watch for subfloor or crawl space issues. If the water has spread beyond what you can safely handle, call water mitigation help. Acting fast helps you nip bigger problems in the bud.
Recent Posts
7 Best Toilet Overflow Water Damage Inspection
When you inspect toilet overflow water damage, you need to move fast and check the
7 Tips for Home Water Damage Assessment
Could a quick visual check reveal water damage before it spreads? Water damage assessment starts
7 Home Water Damage Assessment Tips
Could a quick visual check reveal water damage before it spreads? Water damage assessment starts