Contents
Water can keep damaging materials long after the visible leak stops. You should shut off the main supply, secure the area, and check for storm-driven intrusion fast. Then photograph everything for your insurance claim and start drying walls, floors, and fixtures before mold takes hold, because effective water damage repair depends on the right sequence. Skip it, and repairs get harder, costlier, and less reliable.
Key Takeaways
- Shut off the main water supply and, if safe, cut power to wet areas immediately.
- Photograph and document all water damage before cleanup for insurance and repair records.
- Call a nearby water damage professional quickly for assessment and equipment delivery.
- Start drying, remove standing water, and replace any weakened materials promptly.
- Choose a qualified crew that follows safety rules and uses high-quality materials.
Shut Off Water and Secure the Home
First, shut off the main water supply to stop the leak from causing more damage.
Then use the emergency shut off valve if the main line won’t hold. If you live with others, tell everyone what you’ve done so no one restores flow by mistake.
Next, cut power to wet rooms at the breaker only if it’s safe to do so.
Move valuables, documents, and electronics to a dry area.
Lock doors and windows, and check home security systems after you secure the site.
If water reached outlets, appliances, or structural openings, keep clear and wait for licensed help.
Take quick photos for records, but stay focused on control first.
Your crew will work faster when you’ve already stabilized the home and reduced risk.
Spot Storm Water Damage Quickly
After a storm, you should inspect walls, ceilings, and floors for visible water stains, discoloration, or peeling paint.
Check hidden moisture by feeling baseboards, testing damp areas, and using a moisture meter if you have one.
Quick detection helps you stop damage before it spreads.
Visible Water Stains
Visible water stains often show up as yellow, brown, or gray patches on ceilings, walls, or trim, and they’re one of the quickest signs of storm water intrusion. You should treat each mark as a cue for water stain identification, then map its edges, size, and location to track spread.
Check nearby joints, window frames, and roofline seams for matching discoloration, because stains often point to the entry path. If the area feels damp or the stain darkens after rain, act fast and document it.
Use prevention strategies like sealing exterior gaps, clearing gutters, and improving runoff so your home stays part of a well-protected space. Quick response helps you protect finishes, reduce repair costs, and stay ahead of repeat damage.
Hidden Moisture Checks
Hidden moisture often hides behind paint, baseboards, insulation, and drywall, so you can’t rely on surface stains alone. Use moisture detection tools to scan affected rooms, especially along exterior walls, window frames, and ceilings after storms.
You should check for soft spots, warping, musty odors, and cool patches that signal hidden leaks. Press a flat hand near trim and flooring; if materials feel damp or spongy, investigate further. Remove a small section of baseboard if needed to verify damage without tearing up the whole space.
In a nearby repair crew, you’ll protect everyone faster when you document readings, mark wet zones, and dry them promptly. Quick hidden moisture checks help you catch damage early, reduce repairs, and keep your home safe.
Call a Local Water Damage Pro
When water has soaked into drywall, insulation, flooring, or framing, you should call a local water damage pro fast to limit structural damage and mold growth.
You’ll get an emergency response team that knows how to assess saturation, set up extraction, and start controlled drying before damage spreads. A nearby contractor can also tap local resources, like rapid equipment delivery and familiar building materials, so repairs move quicker.
You benefit from technicians who understand regional weather patterns, common construction types, and code requirements. That local knowledge helps them isolate wet cavities, protect unaffected areas, and restore safe indoor conditions.
Don’t wait for visible stains to worsen; nearby pros can act before hidden moisture turns a manageable cleanup into a major rebuild.
Photograph Damage for Your Insurance Claim
Take clear, well-lit photos of all visible water damage before you move or clean anything.
Capture wide shots and close-ups so your insurer can see the full extent and the details of the affected materials.
Document each room separately and label the images by location to keep your claim organized.
Capture Clear Damage Photos
Before you clean up or move anything, photograph the water damage from multiple angles so you have a clear record for your insurance claim.
Use good lighting, steady framing, and a phone or camera set to the highest resolution. Capture wide shots for damage assessment, then take closer images that show stains, warping, and pooling. Include the source of the water if it’s safe to do so.
Keep each file in a simple photo organization system with dates and labels, so you can share them fast. Check that every image is sharp and unedited.
If you’re part of a nearby repair community, compare notes with neighbors who’ve filed claims; you’ll feel more prepared and less alone. Save originals in the cloud and on your device.
Document Room-by-Room Details
Move through each affected room and document the damage separately so your insurance claim stays organized and easy to verify. Use a room evaluation in every space, noting wet drywall, warped flooring, stained ceilings, and damaged contents.
Keep your document checklist tight and consistent so you and your adjuster can track each item quickly.
- Photograph wide shots first, then close-ups of visible damage.
- Record room name, date, time, and water source if known.
- Label affected belongings with brief notes and serial numbers.
- Save files in folders by room to avoid mix-ups.
Speak with your repair team using the same room labels, and keep copies of everything. When you stay systematic, you’ll feel more prepared and your claim will move cleaner.
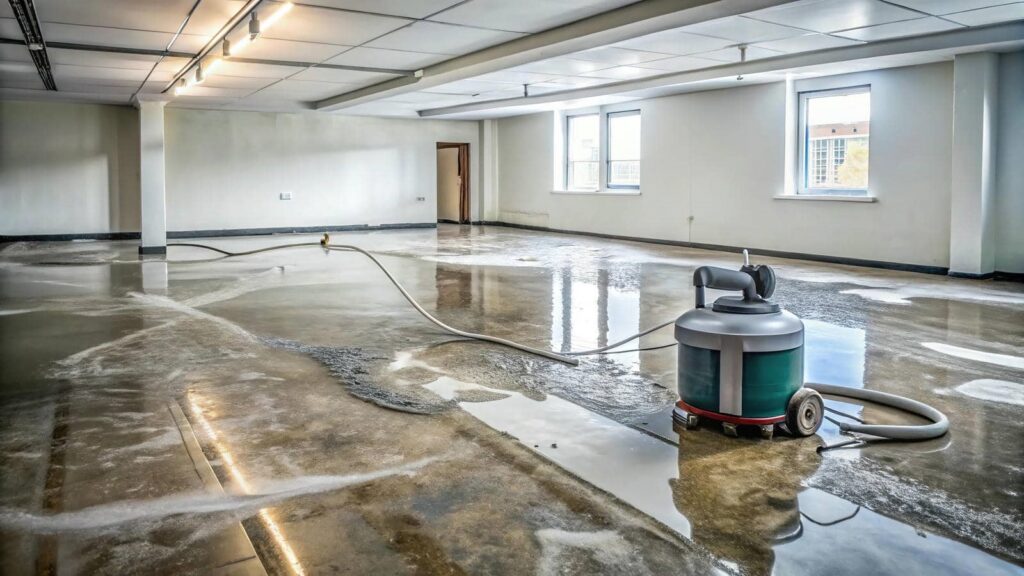
Dry Out Walls, Floors, and Fixtures
Start drying immediately to limit swelling, warping, and mold growth. Open windows if weather allows, and run fans to move air across wet walls, floors, and fixtures.
Use dehumidifier usage to pull moisture from the air, and keep drains, baseboards, and cabinet doors open so trapped dampness can escape.
Check hidden areas behind trim and under sinks, because moisture lingers there and slows recovery. If you can safely remove saturated insulation or panels, do it, then dry framing until it feels cool, not damp.
Monitor readings with a moisture meter, and keep moisture barriers intact where they still protect adjacent rooms.
Stay consistent; your crew at home works best when every surface gets steady airflow and drying time.
Remove Contaminated Water and Debris
Pump out standing water as quickly as you can, then remove wet sludge, ruined drywall, insulation, and other debris with gloves and boots on. Treat every bucket of contaminated water as a hazard, and keep it out of clean pathways so your team stays safe and focused.
Use a pump or wet vac sized for the volume.
Bag debris at the source to limit spread.
Separate salvageable items from waste fast.
Disinfect tools after each debris removal pass.
Move methodically from the farthest point back to the exit, so you don’t track contamination deeper inside. If you’re working with neighbors or a crew, assign one person to haul bags and another to monitor wet spots.
Clear material fully, then inspect for hidden sludge under baseboards, furniture, and corners.
Repair Structural Damage and Restore Rooms
Once the area is dry and debris is gone, assess the structure for warped framing, softened subflooring, damaged insulation, and compromised drywall or trim.
You’ll protect structural integrity by replacing any weakened studs, joists, or sheathing before closing walls.
Cut out saturated drywall at clean lines, then install matching materials and fasteners.
If flooring has cupped or delaminated, remove it and verify the subfloor is level and sound.
Use restoration techniques like sealing exposed wood, adding new insulation, and taping, mudding, and sanding seams for a uniform finish.
Prime repaired surfaces, then repaint and reinstall trim to restore the room’s look.
Work methodically, check each repair twice, and stay with a crew that values quality, safety, and a home that feels like yours again.
Frequently Asked Questions
How Much Does Nearby Water Damage Repair Usually Cost?
You’ll usually pay $1,000-$4,000, depending on damage size and materials. You can lower repair costs by acting fast and filing insurance claims promptly. You’re not alone; local contractors often offer inspection estimates.
Will My Homeowner’s Insurance Cover Mold Removal Too?
Not always; you’ll need to check your insurance policies for mold coverage. You’re usually covered only when a sudden, insured water event causes mold, and you act quickly to document, dry, and report the damage.
How Long Does the Average Water Damage Repair Take?
You’re usually looking at 3-7 days, but the repair timeline shifts like a tide after a damage assessment. You’ll join the crew’s rhythm as drying, demolition, and rebuilding each advance.
Can I Stay in My House During the Repairs?
You can sometimes stay in your house during repairs if crews isolate the area and you’re comfortable with disruptions. Prioritize staying safe; follow their guidance, because moisture levels, mold risk, and repair timeline affect your stay.
What Should I Do if the Damage Smells Musty?
Treat it as active moisture and start drying now; remove wet materials, improve ventilation, and call a pro if needed. Focus on mold prevention and odor elimination so you can keep your space safe together.
Final Thoughts
So, after the grand romance of soaked drywall and mystery odors, you’ll want to shut off the water, document the chaos, and call a local pro who actually knows which end of a dehumidifier is up. Dry everything fast, clear out contaminated debris, and repair the structure before mold stages its comeback tour. If you stay methodical, you won’t just fix the mess—you’ll restore your home without turning it into a science fair for mildew.
Recent Posts
Flood Damage Cleanup: Step-by-Step Guide
When floodwater leaves its mark, flood damage cleanup becomes a sequence of decisions that can
How to Repair Water Damage Quickly
If you spot ceiling stains, swollen drywall, or a musty odor, you need to act
3 Tips for Rapid Flood Damage Cleanup
When floodwater rises like a scene from a cautionary manual, you need to act fast