
Contents
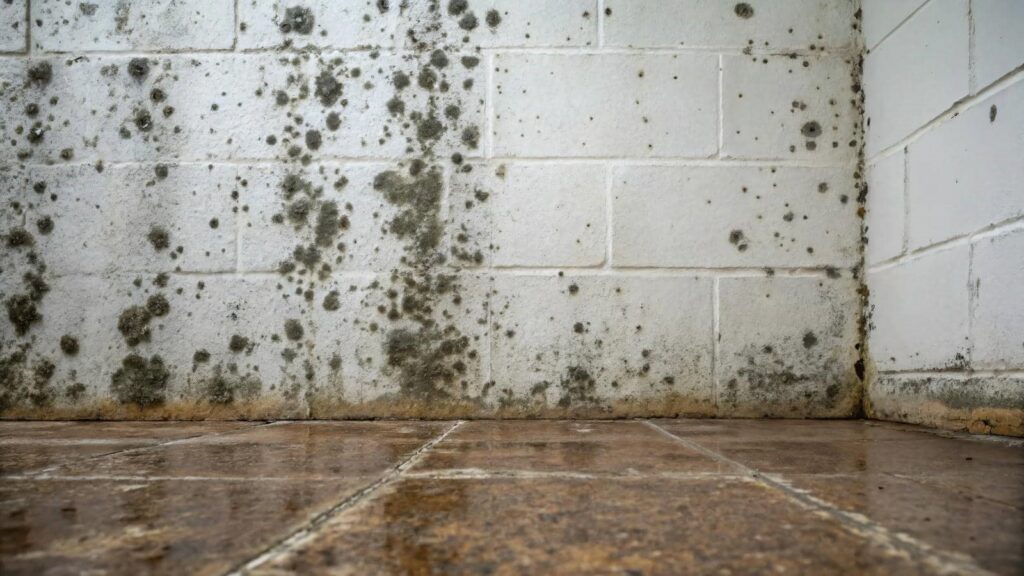
Many homeowners report some form of water damage, and you can’t afford to wait once it starts. You need to shut off the source, contain the area, and inspect walls and floors for hidden moisture before mold takes hold. That’s when water damage mold remediation becomes critical: dry the space fast, remove contamination safely, then repair the leak with mold-resistant materials so the problem doesn’t return. The next step is where many repairs fail.
Key Takeaways
- Shut off the water source immediately and remove standing water with towels, pumps, or a wet vac.
- Contact a licensed plumber or restoration professional quickly to stop damage and begin repairs.
- Contain the area with plastic sheeting, turn off HVAC, and wear gloves, an N95 respirator, and eye protection.
- Dry affected spaces fast using fans and dehumidifiers, keeping indoor humidity between 30% and 60%.
- Remove porous, moldy materials that cannot be cleaned, then disinfect hard surfaces and fix the leak source.
Stop the Water Damage Fast
Shut off the water source immediately and, if needed, turn off the main supply to prevent more damage. You’ll protect your space and help your crew move faster.
Check faucets, supply lines, appliances, and nearby water sources for leaks or burst fittings. If the damage is from a roof or exterior entry, call for an emergency response and document the source before you disturb it.
Move valuables, unplug electronics, and clear safe access so you can work efficiently. Use towels or a wet vac only to control active flow, not to delay repairs.
Then contact a licensed plumber or restoration pro right away. Fast action limits structural damage, reduces repair costs, and keeps your home’s recovery on track for everyone involved.
Contain Mold Before It Spreads
As soon as the water is under control, you need to contain the affected area to keep mold from spreading. Close doors, seal openings with plastic sheeting, and tape the edges tightly to create a clean barrier.
Turn off HVAC systems if they can move spores to other rooms. If you must enter, wear gloves, an N95 respirator, and eye protection.
Remove damp items only after bagging them, so you don’t stir up debris. You’ll protect your space and help your crew stay focused when you isolate the site early.
Different mold types can start mold growth within 24 to 48 hours, so act quickly, keep traffic low, and maintain containment until drying is complete and surfaces are stable.
Find Hidden Mold in Walls and Floors
Once the affected area is contained, inspect walls and floors for hidden moisture and mold growth. You’ll need mold detection techniques like visual checks, a flashlight, a moisture meter, and your nose.
Probe baseboards, drywall seams, carpet edges, and subfloor joints for staining, warping, soft spots, or a musty odor. Use moisture assessment methods to compare readings in damaged zones with dry areas nearby, and mark any elevated spots for follow-up.
If you find bubbling paint, swollen trim, or uneven flooring, assume moisture may be trapped behind the surface. Work methodically so you and your team stay aligned and don’t miss concealed colonies.
Document every suspect area with photos and notes; that record helps you track patterns and plan next steps with confidence.
Dry the Space Thoroughly
Remove all standing water right away using pumps, wet vacs, or towels so moisture doesn’t stay trapped in the structure.
Then increase air circulation with fans and open pathways so damp surfaces dry faster.
Keep dehumidifiers running continuously until humidity drops to safe levels and materials are fully dry.
Remove Standing Water
Use a wet vac, mop, or pump to clear out all standing water as quickly as possible, then start drying the area right away.
Prioritize water extraction in every low spot, behind appliances, and along baseboards where moisture hides. If the volume is large, use a sump pump to remove deeper pooling before it soaks porous materials.
Check for trapped water in cabinets, under flooring, and inside wall cavities if access is safe. Remove soaked rugs, cardboard, and other materials that can’t be cleaned or dried fast enough.
Wipe surfaces with clean towels and replace them often so you’re not spreading moisture around. You’re protecting your space and helping your home recover faster.
Keep working until no visible water remains and surfaces feel only damp, not wet.
Increase Air Circulation
Open windows and doors if weather allows, and place fans so they move air across wet surfaces and out of the room. You’ll help moisture leave faster by creating crossflow and keeping pathways clear.
Use proven ventilation techniques to push stale, damp air outside, and keep interior doors open so each area dries with the rest. If you have air purifiers, run them to capture floating spores while air moves; they support, but don’t replace, drying.
- Aim airflow at walls, floors, and baseboards.
- Lift rugs, cushions, and loose fabrics.
- Shift furniture away from damp spots.
- Check hidden corners for trapped humidity.
- Reposition fans as surfaces begin to dry.
Run Dehumidifiers Continuously
After you’ve improved airflow, bring in dehumidifiers and let them run nonstop until the affected space is fully dry.
Set dehumidifier settings to the manufacturer’s recommended target, usually 30% to 60% relative humidity, and check them twice daily.
Empty the tank, or attach a drain hose for uninterrupted operation.
Keep doors and windows closed so you don’t pull humid air back inside.
Place units near the wettest zones, but leave clearance for intake and exhaust.
Use a hygrometer to verify moisture control in walls, floors, and hidden corners.
If readings stall, add another unit or adjust placement.
You’re not just drying a room; you’re protecting your home and helping your household recover together, faster and with less risk of mold returning.
Remove Mold Safely
Before you start removal, put on gloves, an N95 respirator, goggles, and disposable clothing to limit exposure to mold spores.
Seal off the affected area with plastic sheeting and negative-pressure setup if possible, so you don’t spread contamination to clean rooms.
Keep your work controlled and methodical, and replace any contaminated materials that can’t be fully cleaned.
Wear Protective Gear
Protect yourself with the right gear: wear an N95 or better respirator, non-porous gloves, safety goggles, and long sleeves before you remove any visible mold.
Choose protective clothing that covers your skin and resists splashes. Your respirator mask should fit snugly, and you shouldn’t skip gloves usage when handling contaminated materials.
Keep skin protection complete with pants, a hooded shirt, and taped cuffs if needed. Pick footwear choice that’s closed-toe, waterproof, and easy to clean after the job.
- Tight-sealing safety goggles
- Disposable or washable coveralls
- Thick non-porous gloves
- Rubber boots or shoe covers
- Long sleeves and pants
This gear helps you work confidently as part of a prepared team.
Replace wet items quickly, wash exposed skin after the task, and inspect every piece before you start.
Contain Affected Areas
Next, contain the affected area so mold spores don’t spread while you remove contaminated materials. Close doors, seal vents, and isolate the room with plastic sheeting and tape.
If possible, use negative air pressure and a HEPA air scrubber to support containment strategies. You’ll protect nearby spaces and slow mold growth by limiting airflow and foot traffic.
Keep the area dry as you work, since moisture fuels new colonies. Remove porous items that can’t be cleaned, then bag them immediately and carry them out through the shortest path.
Clean hard surfaces with approved agents, wiping from the cleanest section toward the dirtiest. Stay organized, work methodically, and communicate with your team so everyone follows the same safe process.
Fix the Leak and Repair Damage
Seal the source of the water intrusion immediately, then repair any damaged materials so mold can’t keep spreading.
Start with leak detection at pipes, roofs, windows, and appliances, then shut off water and trace the exact entry point.
Do a damage assessment of drywall, insulation, trim, and flooring; if materials are warped, crumbly, or stained, replace them.
Dry the structure with fans and dehumidifiers while you work.
Use clean tools and sealed bags for debris so your crew stays organized and confident.
- Inspect joints and seals
- Cut out soaked drywall
- Remove swollen baseboards
- Patch plumbing connections
- Rebuild only dry, sound surfaces
Prevent Mold From Returning
To keep mold from coming back, you need to control moisture after the repair is done.
Keep indoor humidity control between 30% and 60% with dehumidifiers, exhaust fans, and HVAC maintenance. You should check plumbing, roofs, windows, and foundations regularly for new leaks, then fix them fast.
Use mold resistant materials for drywall, insulation, and paint in areas that stay damp, like basements and bathrooms.
Dry wet surfaces within 24 to 48 hours, and remove any soaked porous items that can’t be cleaned thoroughly.
Improve airflow by opening vents and moving furniture away from walls.
When you stay consistent, you protect your home and join the group of owners who keep mold out for good.
Frequently Asked Questions
How Soon Should I Call a Professional After Water Damage?
Call a professional within 24 hours, ideally immediately. You’ll get a water damage assessment fast, limit hidden moisture, and protect your space. Prompt professional services help you dry materials, prevent mold, and restore safely.
Can Mold Start Growing Before I Notice Visible Water Stains?
Yes—mold growth can start before you see water stains. As they say, “where there’s smoke, there’s fire.” Check for early signs like musty odors, peeling paint, and damp surfaces; you’ll catch problems sooner and protect your home.
Is It Safe to Stay in the Home During Mold Cleanup?
Usually, you shouldn’t stay during cleanup if mold health risks exist. You can remain only if you follow cleanup precautions, seal affected areas, use ventilation, and your contractor confirms containment keeps exposure low.
Do I Need to Replace Carpets After Flooding?
Not always; you’ll need a moisture assessment first. If fibers, padding, or subfloor stayed saturated, carpet restoration may not be enough, and replacement’s safer. You’re protecting your space, not just the floor.
How Can I Tell if Mold Is Hidden Behind Drywall?
You can’t see hidden mold directly, so you’ll use mold detection methods and drywall inspection techniques: check for odors, staining, soft spots, and moisture readings; then cut test openings or hire a certified inspector.
Recap
When water damage hits, you’ve got to move fast, or mold will spread like ink in a sponge. Shut off the source, contain the area, and dry every hidden pocket of moisture with fans and dehumidifiers. Remove mold safely, repair the leak, and use mold-resistant materials where you can. Keep checking for damp spots and humidity spikes, because prevention isn’t a one-time fix—it’s the lock on the door that keeps mold out.
Recent Posts
7 Tips for Home Water Damage Assessment
Could a quick visual check reveal water damage before it spreads? Water damage assessment starts
7 Home Water Damage Assessment Tips
Could a quick visual check reveal water damage before it spreads? Water damage assessment starts
10 Best Home Water Damage Assessment Tips
If you suspect water damage, you need to move quickly and assess it methodically. Home